How To Connect WiFi IP Camera To a Phone
Choose a section
How To Connect Arenti WiFi IP Camera To a Phone
How To Connect Foscam WiFi IP Camera To a Phone
How To Connect Reolink WiFi IP Camera To a Phone
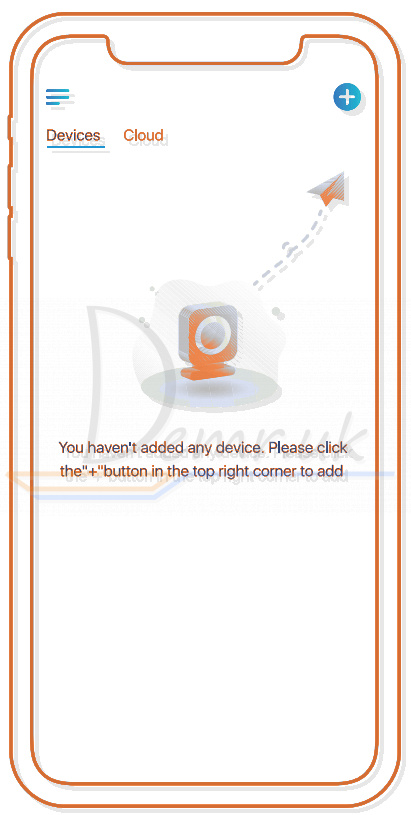
How to connect Arenti GO1 Camera to a Smartphone
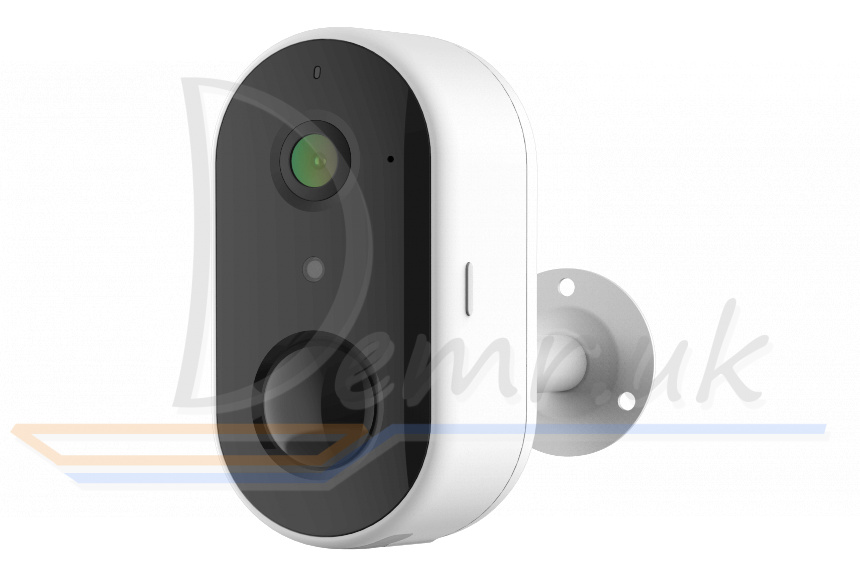
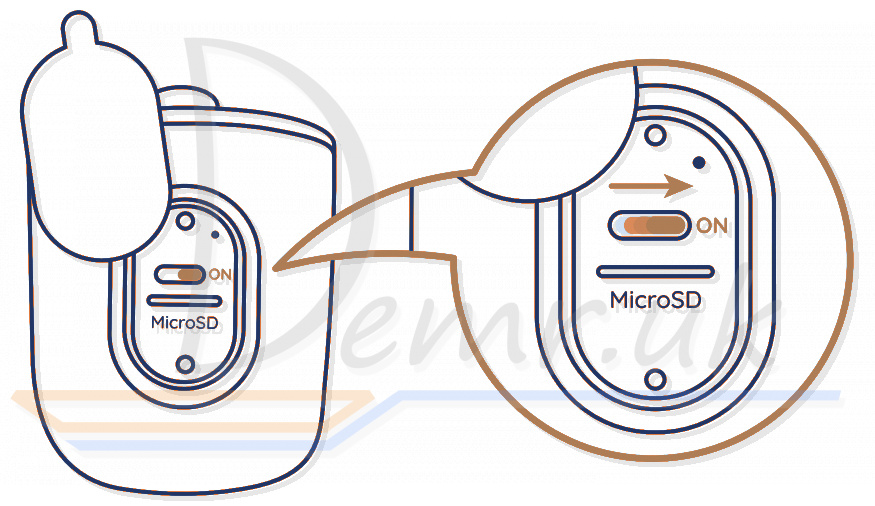
Step 1 Turn on your Arenti GO1 camera by plugging in the power adaptor.
Step 2 Connect your smartphone to the Wi-Fi network.
Step 3 Download Arenti app from the App Store or Google Play depending on your device.
Step 4 Launch Arenti app and sign up for the first use.
Step 5 Follow the steps below to add your camera, then follow the on-screen instructions.
Read more: User manual - Arenti GO1 Camera. Installation, Restore...
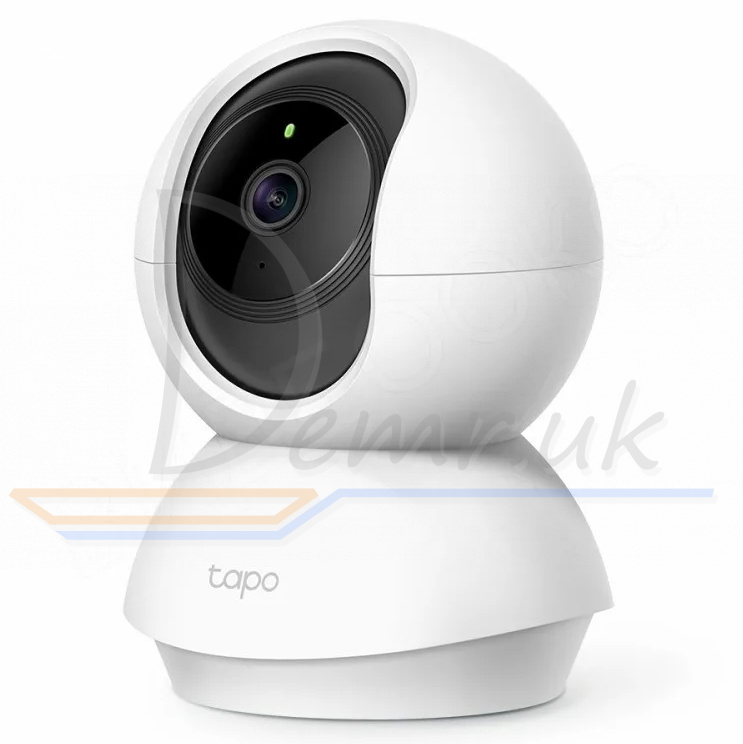
How to connect a Phone to TP-Link Tapo C200 Camera
Follow the steps below to get started with your new camera.
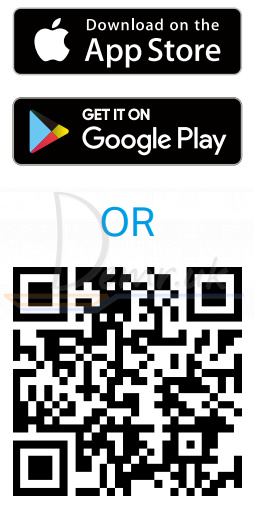
Step 1. Download Tapo App
Get the Tapo app from the Apple App Store or Google Play, or by scanning the QR code below.
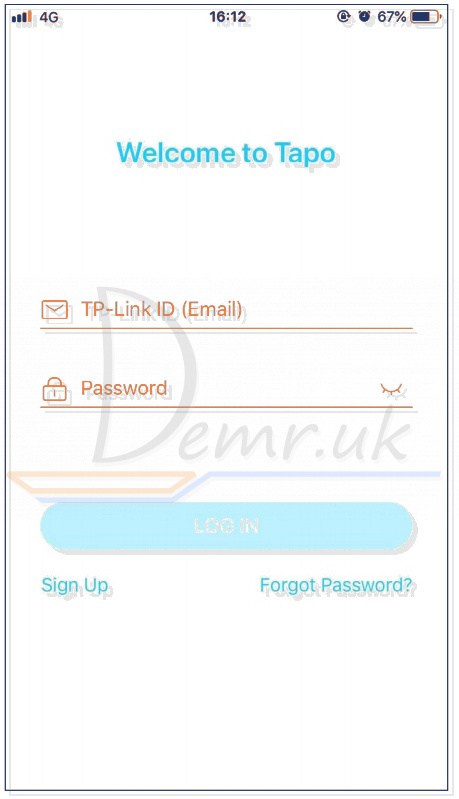
Step 2. Log In
Open the app, and log in with your TP-Link ID. If you don't have an account, create one first.
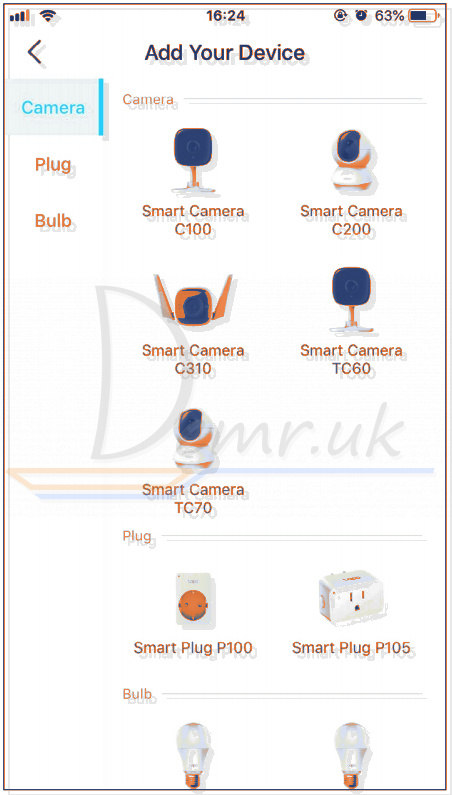
Step 3. Add Your TP-Link Tapo C200 Camera
Tap the  button in the app and select your model.
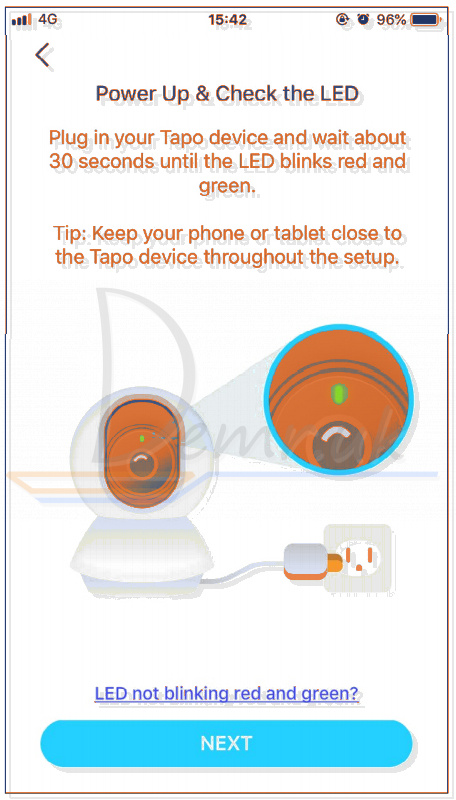
Step 4. Configure TP-Link Tapo C200 Camera
Follow app instructions to configure your camera and add it to your home network.
Read more: User manual - TP-LINK Tapo C200. Mobile app, Specification...
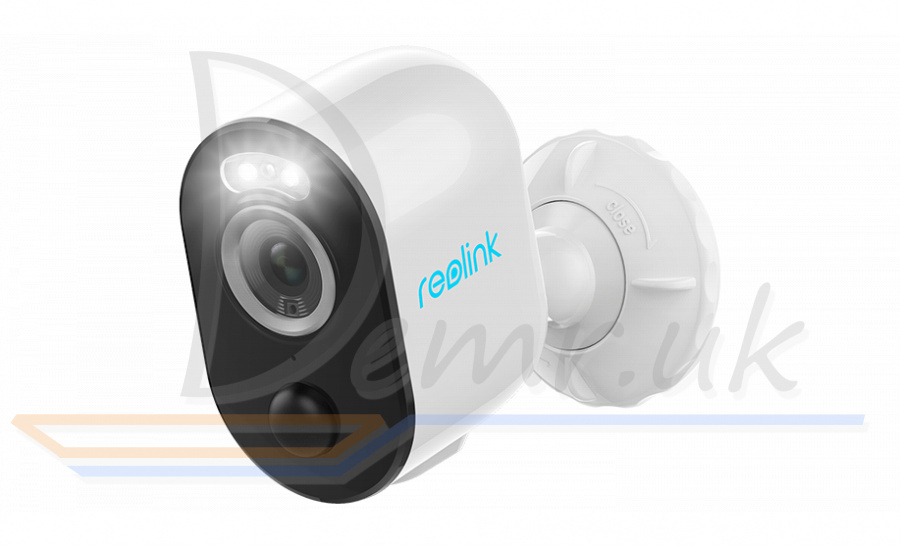
Set up Reolink Argus 3 Pro Camera using a Smartphone
Step 1 Scan to download the Reolink App from the App Store or Google Play store.

Step 2 Turn on the power switch to power on the camera.
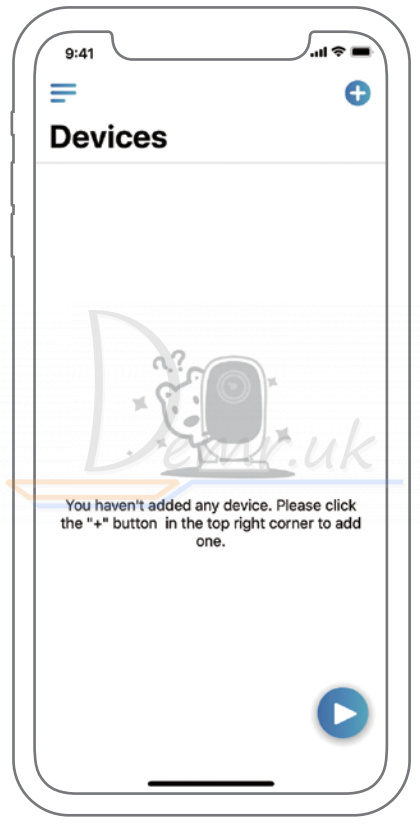
Step 3 Launch the Reolink App, and click the  button in the top right corner to add the camera.
Scan the QR code on the device and follow the onscreen instructions to finish the initial setup.
Read more: Installation guide - Reolink Argus 3 Pro. How to mount, Mobile app...
How to connect Reolink Argus Pro Camera to a Smartphone

Download and install the Reolink App in App Store (for iOS) and Google Play (for Android).
Please follow the prompt tone to configure Reolink Argus Pro (Argus 2) camera.
1. Please click the  button in the top right corner to add the camera.
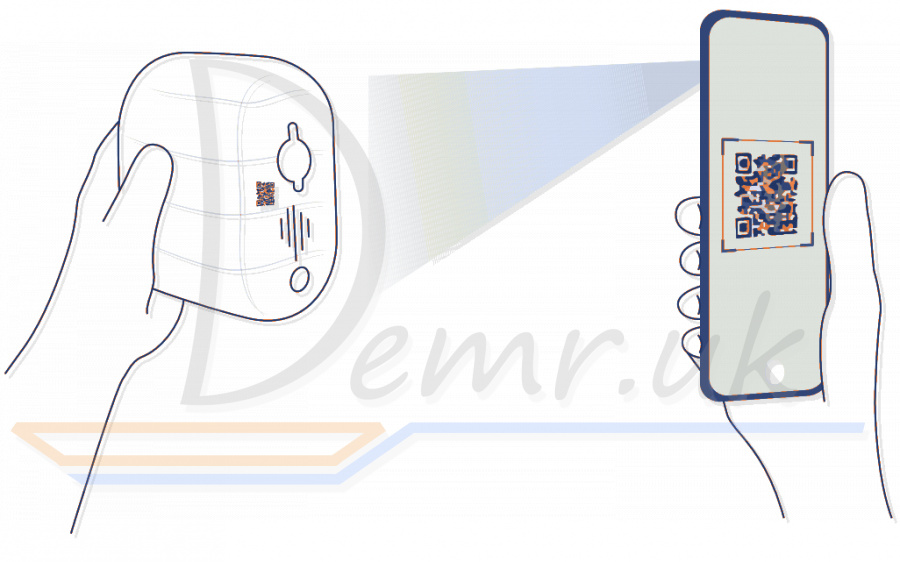
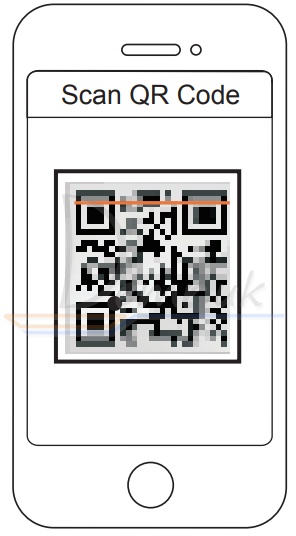
2. Scan the QR code on the back of the camera.
3. Click “Connect to Wi-Fi” to configure the wifi settings.
4. A QR code will be generated on the phone. Please place the QR code on your phone towards Reolink Argus 2 or Pro camera’s lens at a distance of about 20cm (8 inches) to let the camera scan the QR code. Please make sure that you’ve ripped the protection film of the camera’s lens.
Note: To help scanning, please click the QR code to display in full screen
Read more: User guide - Reolink Argus Pro WiFI IP Camera. Factory reset, Connecting to a phone...
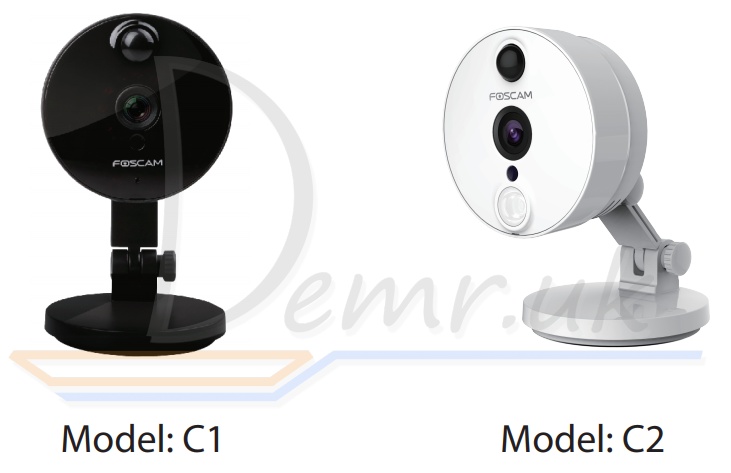
Camera Setup Steps (Foscam C2)
1. Connect the camera to your Internet router using an Ethernet cable.
2. Connect the power adapter to the camera, and wait for a few moments until the camera alerts you that the “Wired connection succeeded”
3. From your smartphone, search for “Foscam”  via the App Store or Google Play Store. Download, install and open the App to begin conguration.
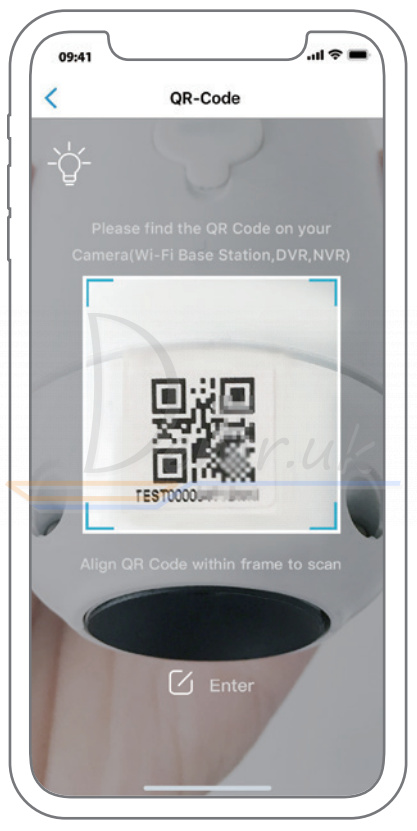
4. Under “Foscam” select “Tap to add a camera” and then select "Camera", after that scan the QR code, which is located at the bottom of your camera (see illustrations below).

Tap + button
Scan the QR code which is located at the bottom of your camera.
5. On the “Choose Setup Method” screen, confirm that “Wired” is selected (upper-left corner) and tap “Ready for Wired Connection.” Wait a few moments for a message confirming that the setup process has been completed (see illustrations below).
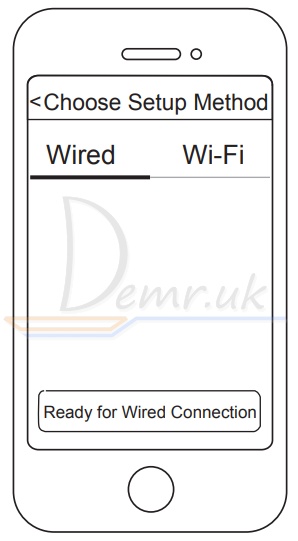
Confirm “Wired” and then tap “Ready for Wired Connection”
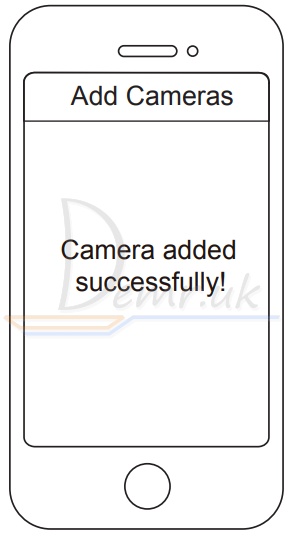
Camera added successfully
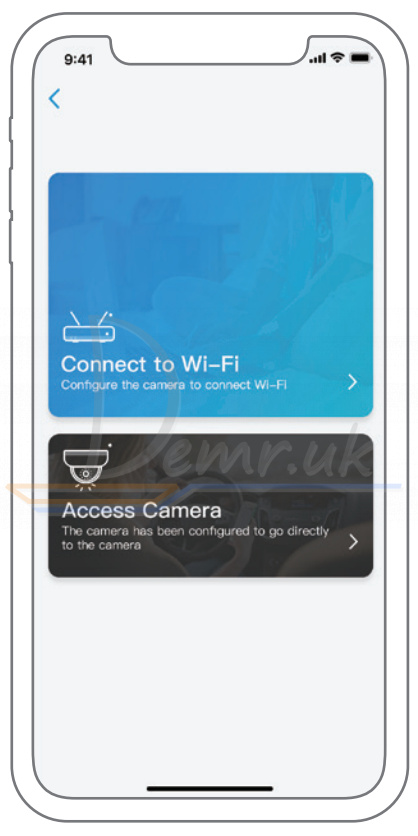
D. Connecting Your Camera Over WiFi
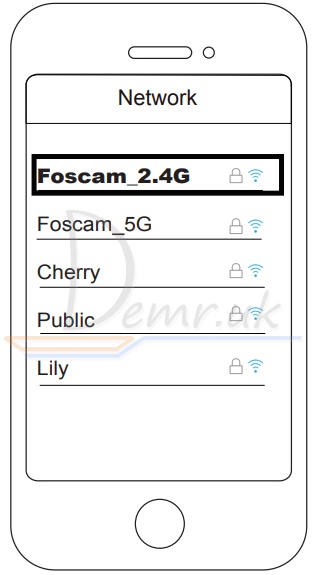
Once you’ve added your camera successfully using the wired connection method above, tap your live camera feed from the “My Cameras” screen tap the gear in the upper-right tap “Network” tap the WiFi network you wish to connect to and enter your WiFi password.
Note: You’ll need to connect to the 2.4GHz network if your wireless router is dual-band—most newer models have 2.4GHz and 5GHz channels (see illustration below).
Read more: Foscam C1, C2 quick installation guide.
Live video stream on smart phone (Sricam SP020)
Trouble shooting:
-If the IP camera can`t be found in step4-4, please make sure you have done step 1-3 to insert a pin to reset the IP camera and wait for 30 seconds.
-If you experience inconsistent signal,it could be due to 1)too many devices sharing the same internet network.Or 2)the IP camera is too far from the router if using Wi-Fi connection.
-If you fail to setup the Wi-Fi network in step 4-7, please make sure your smart phone is not connecting to a 5G Wi-Fi signal. You can resolve this issue by 1) reconnecting to a non-5G Wi-Fi signal on your smart phone or 2) skip this step and setup the Wi-Fi by going through the steps under “settings”>“Network Setting” on the app.
-For any other quality and setup issues,it is recommended you insert a pin (until you hear a clash sound) to reset the IP camera.
More FAQs:
1. How to restore the camera to factory settings
2. How can I add the camera to my 2nd phone
3. Camera ID, Camera Password, App Account ID and Password
4. How to setup Alarm Record
5. How to watch live streams with ONVIF clients
Read more: Sricam IP Camera - User Manual
Ratings
Top 14 Indoor Wi-Fi IP Security Cameras. Buy, Reviews...
Top 15 Best Outdoor Wireless Security Cameras. Reviews, Benefits...