TP-LINK Tapo C200 WiFi IP Camera - User Guide
Appearance - TP-Link Tapo C200 Smart Camera
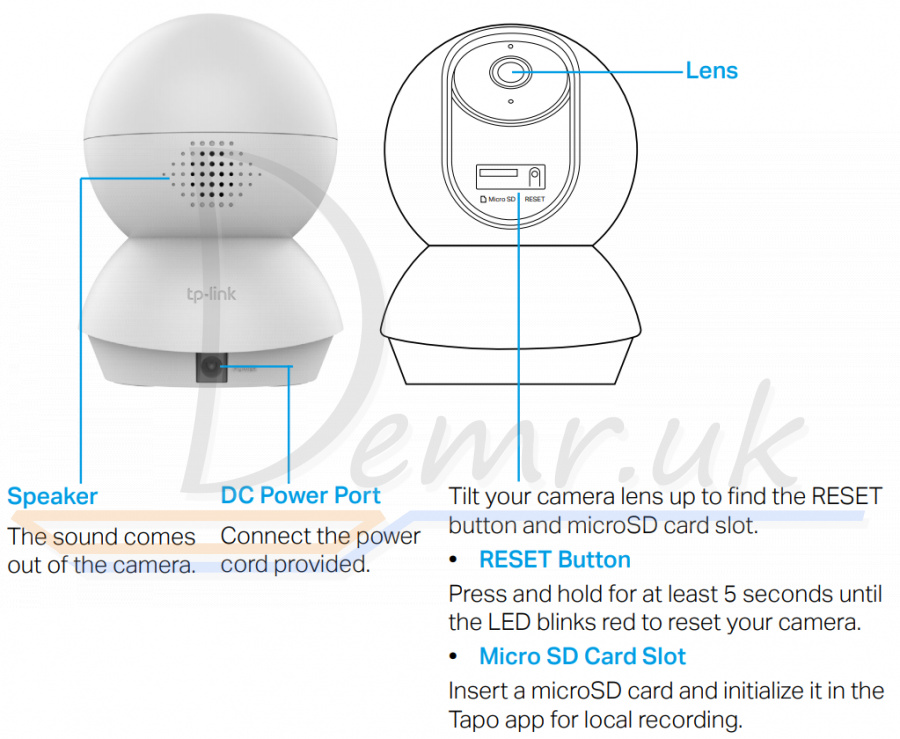
TP-Link Tapo C200 Pan/Tilt Home Security Wi-Fi Camera has a system LED that changes color according to its status, a lens, microphone, speaker, DC power port, RESET button and a microSD card slot. Refer below for details.

Read more about TP-LINK Tapo C200 (reviews, specifications, buy):
How to connect a Phone to TP-Link Tapo C200 Camera
Follow the steps below to get started with your new camera.
Step 1. Download Tapo App
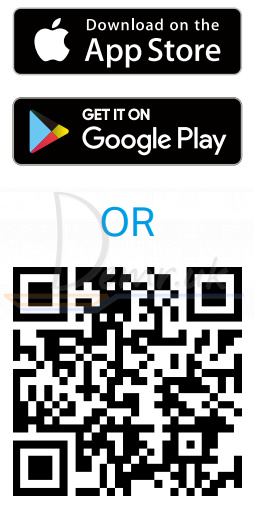
Get the Tapo app from the Apple App Store or Google Play, or by scanning the QR code below.
Step 2. Log In
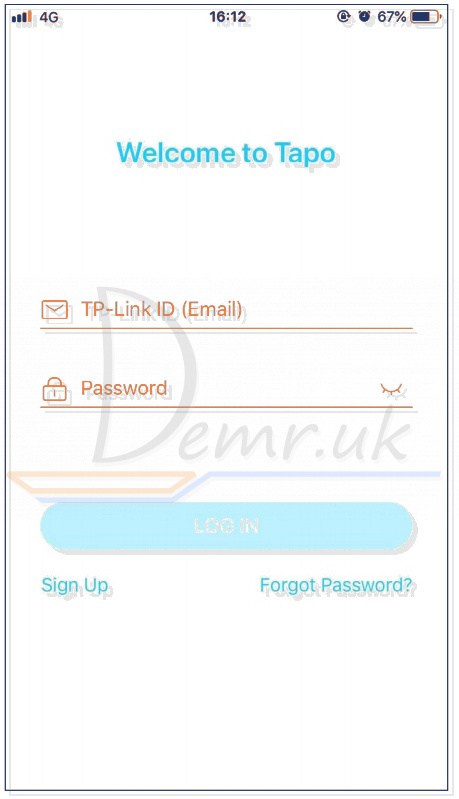
Open the app, and log in with your TP-Link ID. If you don't have an account, create one first.
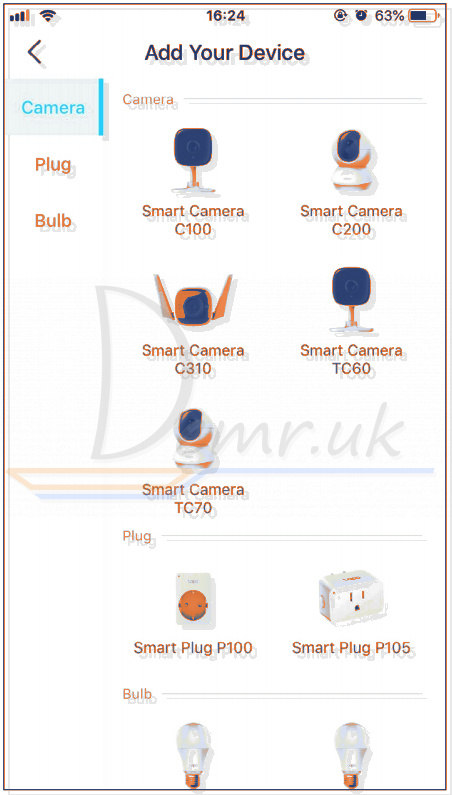
Step 3. Add Your TP-Link Tapo C200 Camera
Tap the  button in the app and select your model.
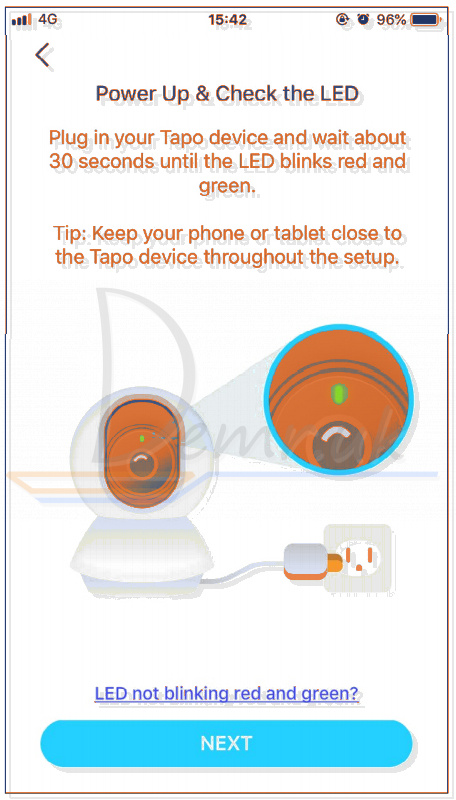
Step 4. Configure TP-Link Tapo C200 Camera
Follow app instructions to configure your camera and add it to your home network.
How to mount TP-Link Tapo C200 Camera
Place your TP-Link Tapo C200 camera on a flat surface, or install it on a wall or ceiling with the provided mounting template and screws.
Note: Make sure you affix the camera base using screws before securing the camera.
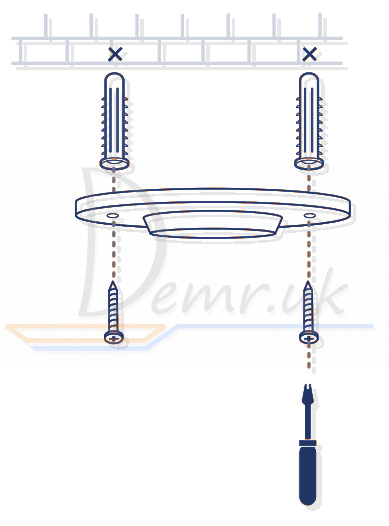
1. Mark Position
Place the mounting template where you want the camera.
For wall mounting, drill two holes through two circles.

2. Mount Base
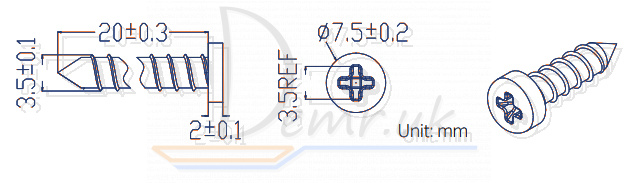
Affix the camera base using the screws.
For wall mounting, insert two anchors into the holes and use the screws to affix the camera base over the anchors.
3. Secure TP-Link Tapo C200 Camera
Attach the camera on the base and rotate to secure the camera.

Main TP-Link Tapo C200 Camera Controls
After you successfully set up the camera, you will see your camera listed on the home page. You can view and manage your camera from anywhere at any time with the Tapo app.
Home Page
This page lists all your cameras you've added and you can view them directly and manage them easily. Tap the camera or go to Camera Preview > Manage to enter the Live View page.

Live View
Talk or Voice Call: Communicate with loved ones
Pan & Tilt: Rotate your camera to monitor every angle of your room
Privacy Mode: Enable to temporarily shut down the surveillance for privacy
Alarm: Turn on to get noticed when motion detected
Playback & Memory: Check all recordings and saved moments

TP-Link Tapo C200 Camera Settings
On Live View page, tap  to enter the Camera Settings page. You can change the settings of your camera to meet various needs, such as change your camera name, customize detection settings and recording schedules, turn on or off notifications, set activity zones, etc.

Me
On this page, you can edit your account, quickly check the memorable moments you saved, or find the FAQs and other features related to the Tapo app.

Read more about TP-LINK Tapo C200 (reviews, specifications, buy):
Pan & Tilt Control - TP-Link Tapo C200
On the Live View page, tap  to enter the control page. Tap on the Pan & Tilt panel to control your TP-Link Tapo C200 camera to move.
Pan & Tilt Settings: Tap  to set how many degrees the camera will move per tap of the Pan & Tilt.
Vertical Cruise: Persistently move up and down.
Horizontal Cruise: Persistently move from left to right.
Mark Position: Tap to mark your current position, and then you can quickly rotate your camera to the marked direction with just a tap.


Motion Detection - TP-Link Tapo C200
With motion detection, the Tapo app alerts you of activity that matters and sends notifications straight to you when motion detected.
Insert a microSD card to record the clips when motion detected. Otherwise, you can only receive the notifications.
Note: Initialize the SD card on the app before using it.
1. Go to Camera Settings page and tap Detection & Alerts to customize its current detection settings.

2. On the Detection & Alerts page, enable the Motion Detection function. It's recommended to enable the Notifications function to receive motion detection messages.

3. Customize Camera Alarm settings. Choose Alarm Type (Sound/Light) and Alarm Sound (Siren/Tone), and set Alarm Schedule as needed.

4. Customize Activity Zones and the camera will only detect motion in custom zones. Entire view is covered by default.

5. Adjust Motion Sensitivity (Low/Normal/High) as needed. Increased sensitivity results in more recordings and notifications.

6. After editing the detection settings for the camera, you can set the Recording Schedule for the motion detection.

7. On the Live View page, tap  to find all recordings. The orange sections are recordings for motion detection.
Note: The microSD card is needed for recordings. Initialize the SD card on the app before using it.


24-hour Recordings - TP-Link Tapo C200
The microSD card is needed for 24-hour recording and it’s suggested to initialize the SD card on the app before using it.
1. On the Live View page, tap  to enter the Camera Settings page.

2. Toggle on to enable the microSD Recording function and set the Recording Schedule for Continuous Recording (24-hour Recording) as needed.

3. On the Live View page, tap  to find all recordings. The blue sections mean continuous recording.
Note: The microSD card is needed for recordings. Initialize the SD card on the app before using it.


Privacy Mode - TP-Link Tapo C200
On the Live View page, tap  to enable the Privacy Mode. When enabled, streaming and recording functions will be temporarily disabled to protect your privacy.

Specifications - TP-Link Tapo C200
Camera
✓ Image Sensor: 1/2.9“
✓ Resolution: 1080p Full HD
✓ Night Vision: 850 nm IR LED up to 30 ft
✓ Lens: F/NO: 2.4; Focal Length: 3.83mm
✓ View Range: 360° horizontal and 114° vertical
Audio
✓ Audio Communication: 2-way audio
✓ Audio Input & Output: Built-in microphone and speaker
Video
✓ Video Compression: H.264
✓ Frame Rate: 15fps
✓ Video Streaming: 1080p
✓ Audio Compression: G.711
Activity Notifications
✓ Input Trigger: Motion detection
✓ Output Notification: Push notification
Hardware
✓ Button: RESET button
✓ Indicator LED: System LED
✓ Adapter Input: 100-240VAC, 50/60Hz, 0.3A
✓ Adapter Output: 9.0V/0.6A
✓ External Storage: Micro SD card slot (Supports up to 128GB)
✓ Dimensions (W x D x H): 3.3 x 3.4 x 4.6 in. (85.4 x 86.8 x 117.7 mm)
Network
✓ Wireless Rate: 11Mbps(802.11b) 54Mbps(802.11g) 150Mbps(802.11n)
✓ Frequency: 2.4GHz
✓ Wireless Security: WEP, WPA/WPA2-PSK
✓ Security: 128 bit AES encryption with SSL/TLS
✓ Protocol: TCP/IP, DHCP, ARP, ICMP ,DNS, NTP, HTTP, HTTPS, UDP, ONVIF, RTSP
Others
✓ Certification: FCC, IC, CE, NCC, RCM, RoHS
✓ System Requirement: iOS 10+, Android 4.4+
✓ Package Contents: Tapo C200 Camera ,Power Adapter, Quick Start Guide, A Camera Base, Mounting Screws, Mounting Template
✓ Operating Temperature: 0 ºC ~ 40 ºC (32°F ~ 104°F )
✓ Storage Temperature: -40°C~70°C (-40°F~158°F)
✓ Operating Humidity: 10%~90%RH, Non-condensing
✓ Storage Humidity: 5%~90%RH, Non-condensing
Factory reset - TP-Link Tapo C200 Camera
1. While TP-Link Tapo C200 camera is powered on, tilt the camera lens up, then press and hold the RESET button for at least 5 seconds until the LED blinks red.
2. The camera will reset and reboot.
Read more about TP-LINK Tapo C200 (reviews, specifications, buy):
Read also
Ring Stick Up Cam Battery (3rd Generation) Wi-Fi IP Camera - Manual
Read also
User manual - Reolink Go WiFI IP Camera. Factory reset, Connecting to a phone...
Manual - Reolink E1 Outdoor Camera. Specification, Installation...
User guide - Arenti GO1. Installation, Restore...
Manual - Reolink Argus 3 Pro WiFI Camera. How to mount, Mobile app...
User manual - Reolink Argus Pro WiFI Camera. Factory reset, Connecting to a phone...
Ring Stick Up Cam Battery (3rd Generation) Wi-Fi IP Camera - Manual
Ratings
Top 14 Indoor Wireless Security Cameras. Buy, Reviews...
Demr.UK is a participant in the Amazon Services LLC Associates Program, an affiliate advertising program designed to provide a means for sites to earn advertising fees by advertising and linking to products on Amazon.com. Amazon and the Amazon logo are trademarks of Amazon.com, Inc, or its affiliates.