Ring Stick Up Cam Battery (3rd Generation) Wi-Fi IP Camera - Manual
Set up your Ring Stick Up Cam Battery - WiFi IP camera
Download the Ring app
The Ring app walks you through setting up and managing your Stick Up Cam. Search for "Ring" in one of the app stores below

Charge the provided battery
First, fully charge the battery by plugging it into a USB power source using the provided orange cable.
The battery is fully charged when just one LED is lit.

Remove the battery cover
Twist the battery cover counterclockwise to unlock, then remove it from your Stick Up Cam.
Insert the battery
Insert the charged battery into the bottom of your Stick Up Cam until it clicks into place.
Now place the battery cover back onto your Stick Up Cam.
Set up your Stick Up Cam in the Ring app
Create or Log in to Your Account
If this is your first Ring product, you will be asked to set up an account.
To set up an account:
- Open the Ring app.
- Select "Create Account."
- Follow the in-app instructions to create a new account.
If you already have another Ring device installed, simply open the Ring app.
Tap "Set Up a Device"
Tap "Set Up a Device" then select "Security Cams"
Scan the QR code or MAC ID barcode on your Ring device
The QR code can be found on the inside of the removable battery cover for your Stick Up Cam Battery.
- Point the camera on your smartphone at the QR code or MAC ID barcode on your Stick Up Cam. This code can also be found on the product packaging or on the Quick Start Guide that came with your device.
- Center the code in the phone camera's view at the top of the screen.
- Once the code is recognized, a green square (for QR code) or a green line (MAC ID barcode) will appear, and the setup will proceed to the next step.
Note: If you experience issues with scanning the QR code or MAC ID barcode, you can select "Set Up Without Scanning" and select "Stick Up Cam Battery Battery/Solar" to continue through the setup process.
Specify Your Location
If this is your first time setting up a Ring device, you will receive a request from your phone informing you that the Ring app wishes to use your phone's location services to pinpoint your location. Allowing the app to do so will assist with inputting your address.
Enter your address information into the app, then confirm it.
If you have established a location previously, you can select it from the list of your locations.
Note: Without a specific location, certain features of your Stick Up Cam will not work properly.
Choose Where Your Stick Up Cam Will Be Installed
Select either "Indoors" or "Outdoors" based on where you plan to install your Stick Up Cam.
If you chose "Indoors", select whether or not your Stick Up Cam will be facing a window.
Note: By facing your Stick Up Cam towards a window you can block night vision and significantly reduce Motion Detection reliability.
Name Your Device
Select a specific name for your Stick Up Cam Battery/Solar to distinguish it from other Ring devices on your account. You can choose one of the default names that are suggested, or you can enter your own by selecting "Custom..." at the bottom of the list.
Insert the battery
Insert the battery with the flat metal catch facing the back of your Stick Up Cam. The largest portion of this catch should be on the bottom.
When you have inserted the battery properly, you should hear a 'click'. This means the battery is properly secured.
Wait 30 seconds for your Stick Up Cam to power on.
Wait for Your Stick Up Cam to Enter Setup Mode
Your Stick Up Cam will enter Setup Mode after inserting the battery. When the light on the front of your Stick Up Cam begins flashing blue, tap "The Light is Flashing" in your Ring app to continue to the next step.
If your Stick Up Cam does not go into Setup Mode automatically after powering on, press and release the small orange button under the battery cover.
Connect to Your Ring Device
iOS: Tap "Join" when the Ring app asks to join the Ring wifi network.
Android: Your device should automatically connect to the Ring wifi network.
If your device does not automatically connect to the Ring wifi network, or if you chose to continue without scanning in step five, please follow the steps below:
- Press the home button on your phone to leave the Ring app.
- Navigate to the Settings app, then tap wifi. On Android, you may need to navigate to Connection then wifi.
- Select the Ring wifi network from the list of available networks. The network will appear as either: Ring- followed by the last six digits of the MAC ID; Ring Setup followed by the last two digits of the MAC ID.
- Once connected, close your Settings app and return to the Ring app.
Connect Your Stick Up Cam Battery/Solar to Your Wifi
Be sure you're near your router and have your wifipassword ready.
- Select your wifi network. If you have more than one wifi network, select the network closest to where you will be installing your Stick Up Cam.
- Enter your wifi password and press Continue.
Note: After connecting to your wifi network, your Stick Up Cam will update its internal software. While performing an update, the light on the front of your device will flash blue. Do not unplug your device while this update is in progress. When the blue light stops flashing, you can tap "Continue" in the Ring app and begin using your Stick Up Cam.
Test Your Device
Once your Stick Up Cam Battery/Solar has completed its update and setup, configure your Stick Up Cam's motion zones, then open Live View to test your camera.
Try it out!
After setup, tap the Live View button in the Ring app to see live video from your Stick Up Cam.
Blue light flashing?
If the light on the front of your Stick Up Cam is flashing after setup, it's updating its software.
Do not remove the battery from your Stick Up Cam while the light is flashing!
Performing a hard reset
If your Stick Up Cam is fully charged, and the light still doesn't start pulsing when you push the orange button, try performing a hard reset.
To perform a hard reset, hold down the orange button for 15 seconds.
After releasing it, the light on the back will flash a few times indicating that your Stick Up Cam is restarting.
Give it about a minute to fully complete this process, then put it in setup mode again by briefly pressing the orange button on the back.
Understanding the LED Patterns On Your Stick Up Cam Battery/Solar Cam
Camera is idle - LEDs off
Camera is in Setup mode - Slow blinking pattern, blue light
Camera is starting up - Solid light, blue
Firmware update in progress - Light blinks on and off, then is on for two seconds, blue
Camera is recording - Solid light, blue
Two-way talk/speaker enabled - Very slow, pulsing light, blue
Alarm/siren is sounding - Fast blinking light, red/blue
Setup is successful - Light blinks on for five seconds, blue
Setup has failed, incorrect password - Light flashes on and off, red
Setup failed to connect to wifi - Light flashes on/off, red/blue
Camera is booting up - Solid light until bootup is complete, blue
Factory restore - Light blinks on and off for five seconds then reboot, red
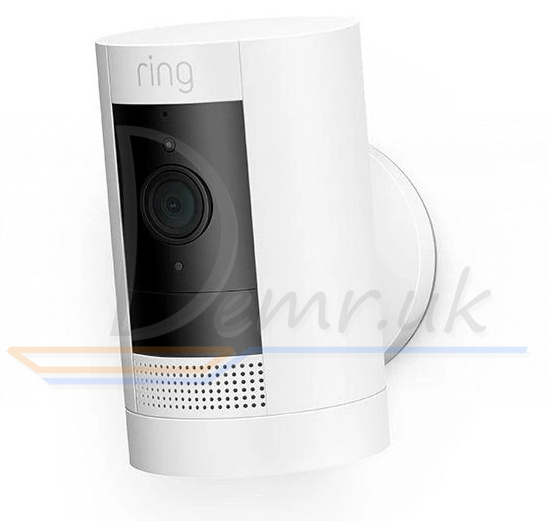
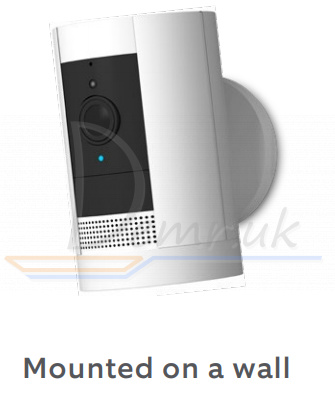
Install your Stick Up Cam
Choose a location
Stick Up Cam is happy just about anywhere, indoors or out. It comes ready to sit on a flat surface like a table or shelf, but can also be mounted to a wall.
Choose a spot where it can provide the view you want.

Wanna mount to a ceiling?
Mount to a ceiling with the Ring Stick Up Cam Mount (sold separately).
Insert the charged battery, then place it at your chosen location. Your Stick Up Cam is now ready to protect you.
Once you're done, check out the live video in the Ring app to make sure you have the view you want.
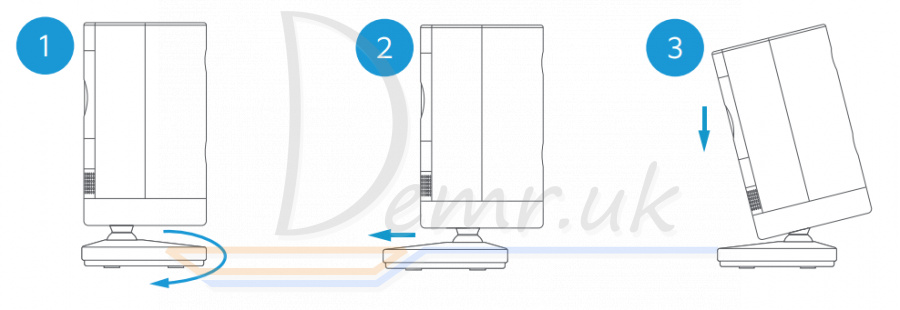
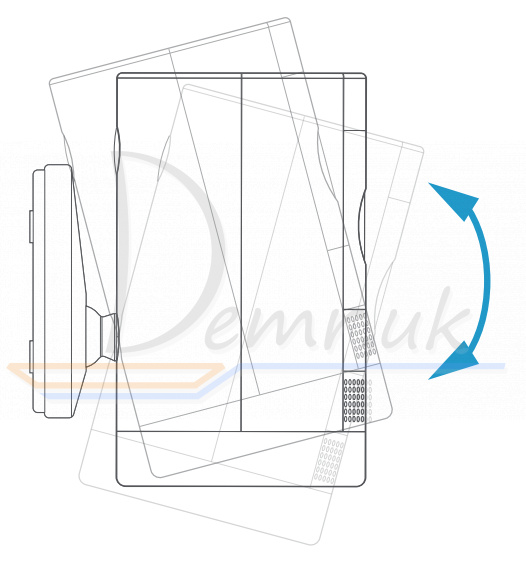
If you'd like a downward camera angle...
Swivel the base around so that the long side faces the front, then tilt your Stick Up Cam so it points downward.
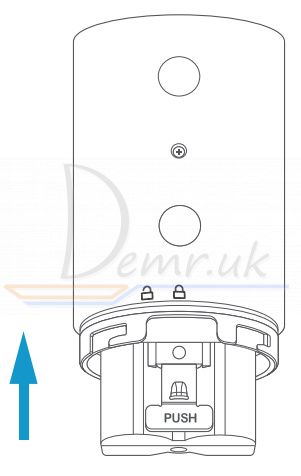
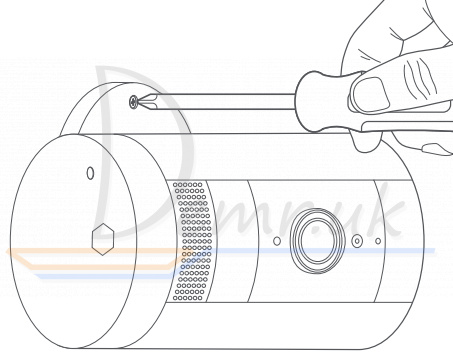
Install the security screws (optional)
Your Stick Up Cam comes with two optional security screw locations
One secures the battery compartment, and the other secures the mounting bracket to the base. To use them, open the battery compartment and/or remove the mounting bracket, then pop out the rubber plug(s).
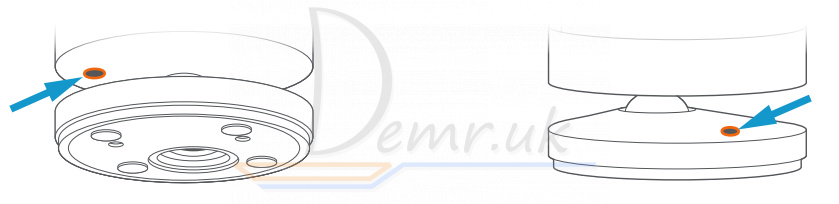
1 Swivel the base so the long side faces the front.
2 Insert and drive the security screw into the base screw location with a standard Phillips-head screwdriver (not included).
3 Turn your Stick Up Cam over to access the battery compartment screw hole, and drive the second security screw.
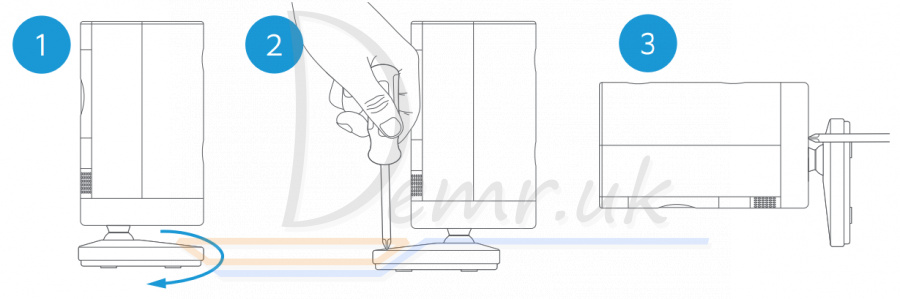
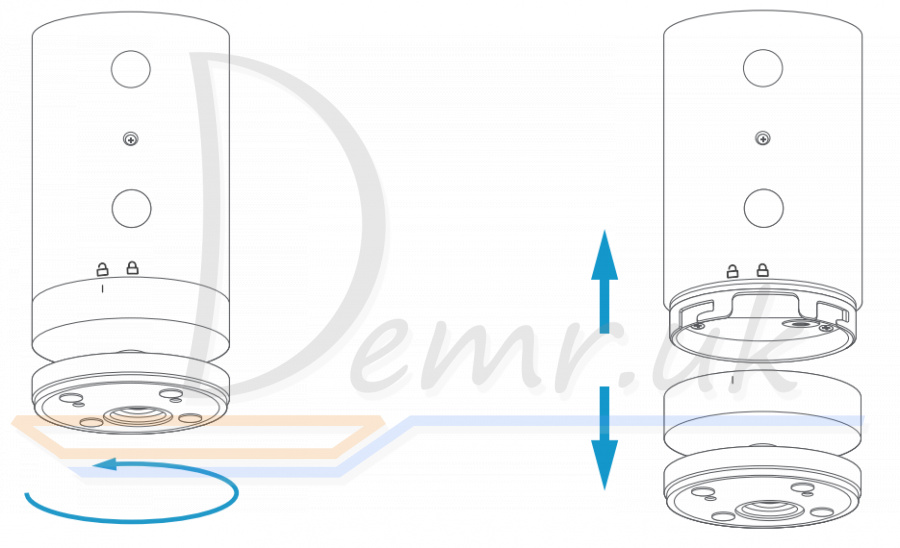
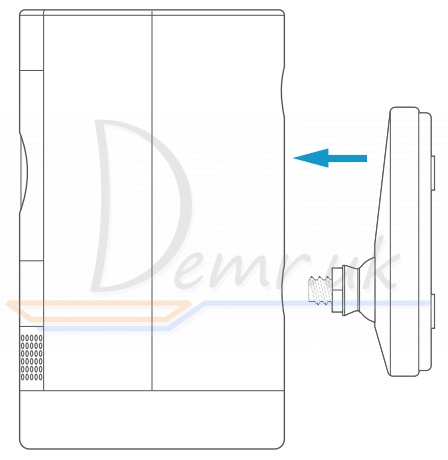
Remove the base
Unscrew it using a standard Phillips-head screwdriver (not included)
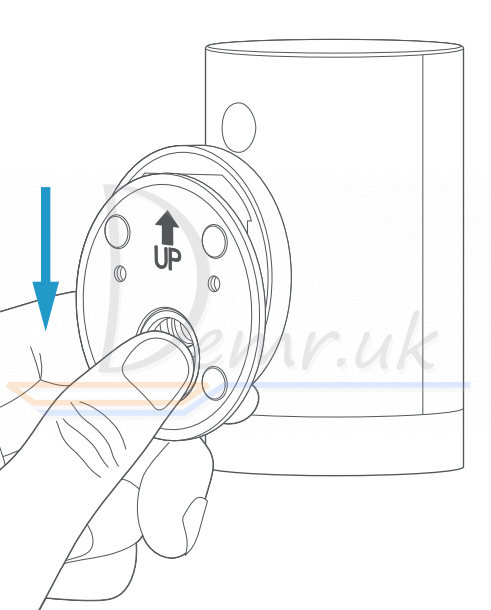
Re-attach the base
Screw it into the back of your Stick Up Cam with the "UP" arrow on the bracket pointing upward.
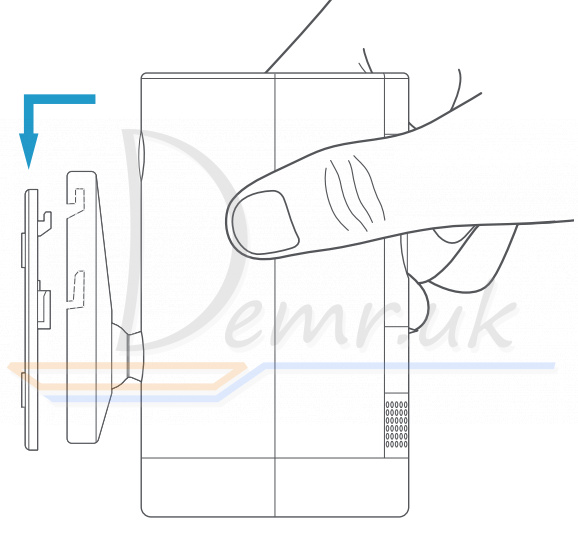
Remove the mounting bracket
Slide it down to remove it from the base
Drive the screws
Hold the bracket against your wall, making sure the "UP" arrow is pointing upward, and mount it with the included screws.

Mount your Cam
Guide the grooves in the base onto the hooks on the bracket. Slide Stick Up Cam down to secure it to the wall.
Check it out!
Now rotate it to your desired angle, and check out the live video in the Ring app to make sure you have the view you want.
Install the security screws (optional)
Your Stick Up Cam comes with two optional security screw locations.
One secures the mounting bracket to the base, and the other secures the battery compartment.
To access them after you've mounted your Stick Up Cam, rotate it to either side.
To install the base screw...
First, slide your Stick Up Cam off of the mounting bracket.
Pop the rubber plug out of the base, then place Stick Up Cam back on the bracket.
Secure with one of the provided screws.
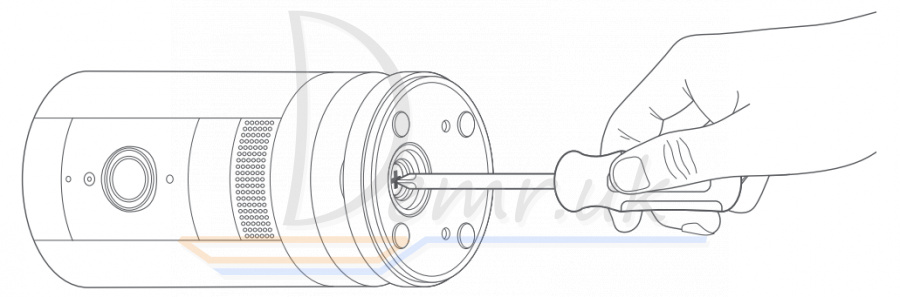
To install the battery compartment screw...
Remove the battery compartment, pop out the rubber plug, then replace the battery compartment on your Stick Up Cam.
Secure with one of the provided screws.

Read also
Victure PC530 Wi-Fi Security Camera - Manual
Xiaomi Mi Mijia Smart Home Camera 360° - manual
Sricam CMS Manual - PC Software
How to use TP-LINK Tapo C200. How to mount, Mobile app...
How to use Reolink Argus 3 Pro. Specification, Installation...
How to use Reolink Argus Pro WiFI IP Camera. Mobile app, Specification...
Ratings
14 Best Indoor Wi-Fi IP Security Cameras. Benefits, Buy...