Haylou GT5 Headphones - User Guide
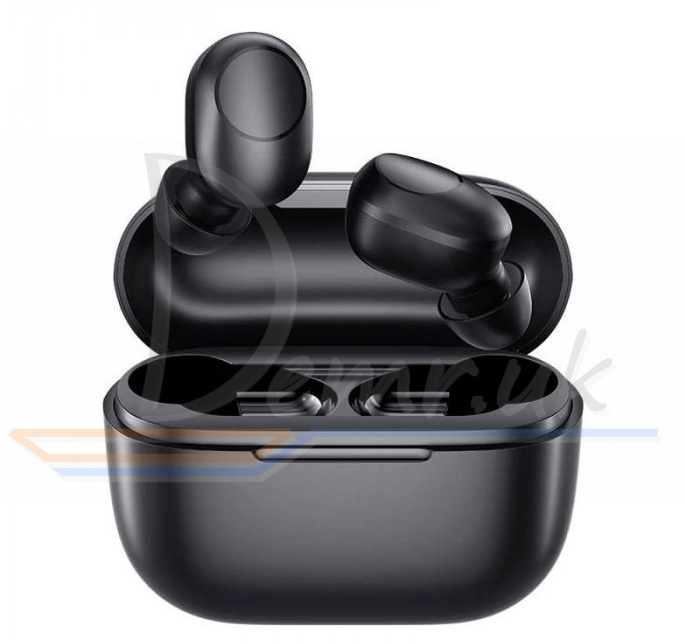
Haylou GT5 True Wireless Earbuds Introduction
Package list
Ear tips × 3 pairs ( Medium ear tips have been assembled)
Haylou GT5 earbuds ( R×1, L×1)
Charging case ×1
Charging cable ×1
User manual ×1
Specifications - Haylou GT5
Earbuds
Operation range: 10m ( open space with no obstacle)
Battery capacity: 40mAh ( single earbud)
Charging time: Approx. 2hr
Talk time: Approx. 4hr
Standby time: Approx. 60hr
Input parameter: 5V 100mA
Battery Type: Li-ion
Bluetooth version: v5.0
Read more: Specifications - Haylou GT5. Frequency response, Playtime...
First Use - Haylou GT5 Earbuds
Tear off the stickers, then fully charge the charging case and Haylou GT5 earbuds.
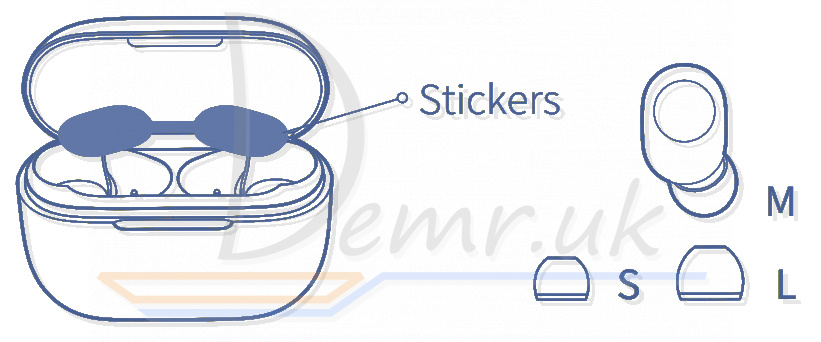
Choose the most suitable ear tips. (Earbuds have been assembled with M-size ear tips)
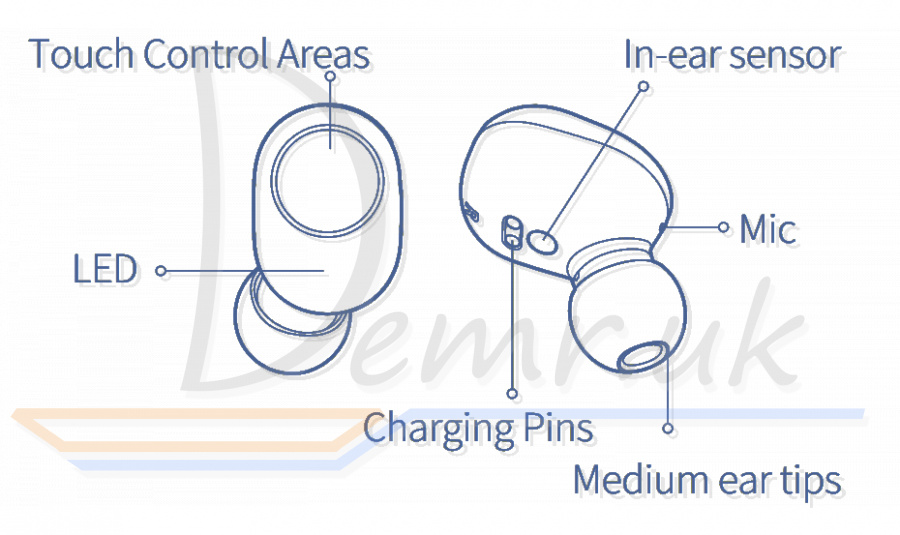
How to wear Haylou GT5 Earbuds
Distinguish left and right earbuds, and adjust earbuds to fit your ears comfortably.
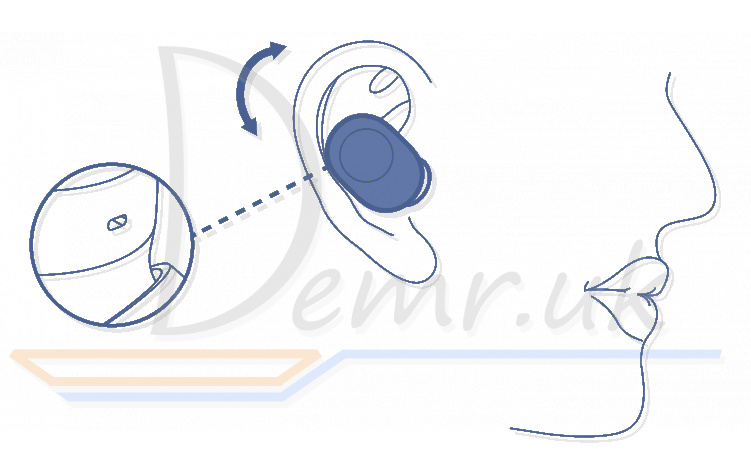
Please set Mic towards your mouth to get a better calling experience.
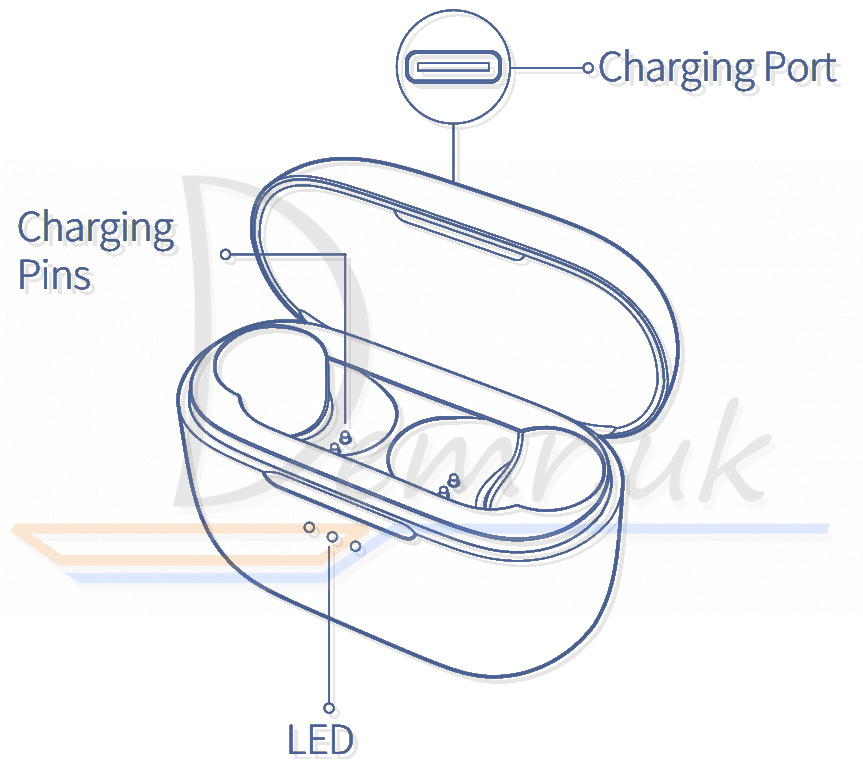
How to Charge Haylou GT5 Earbuds
Earbuds
Put Haylou GT5 earbuds back to the case to charge.
Ps: The LED glows solid red. After the earbuds are fully charged, the LED will turn white for 1 minute.
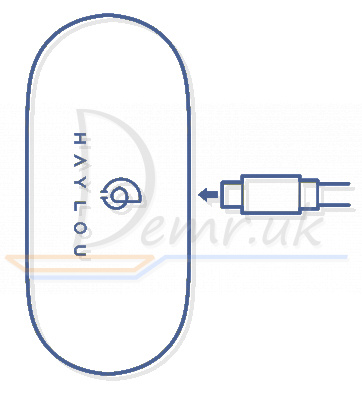
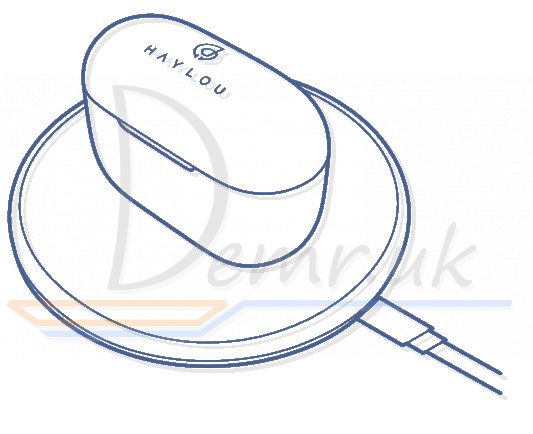
Charging Case
1. Charge via USB Type-C cable
2. Wireless charge
Read more: Charging the headphones - Haylou GT5. Charging your headphones...
How to connect Haylou GT5 Earbuds to a Phone
Automatically Pair
1. Take two Haylou GT5 earbuds out from the charging case simultaneously. After the white light is on, then the red and white lights start to flash alternately. If the above process is completed, the earbuds will be successfully paired.
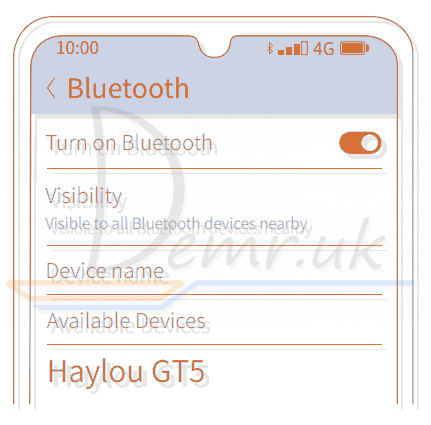
2. When the white light of the left/right Haylou GT5 earbud flashes slowly, turn on Bluetooth and search for "Haylou GT5", then tap to connect
3. After the first connection, the earbuds can be automatically connected to the lastest paired device when turned on (Bluetooth needs to be turned on).
Note: If the connection fails, put the earbuds back to the charging case and repeat the above operation.
Manually Pair
When Haylou GT5 earbuds is turned off, press and hold for 1.5s to turn on the two earbuds, then wait for 2-3s for the earbuds to be connected in series, and when the white light of the right earbud flashes slowly, turn on the device's Bluetooth to connect.
How to Turn On/Off Haylou GT5 Earbuds
Pick out Haylou GT5 earbuds to power on. Hold MFB for 1.5s to power on(LED glows white for 1s), if earbuds are not in carry case.

Push earbuds back in case to power off them. Hold MFB for 4.5s to power off earbuds(LED glows red for 2s).

How to Control Haylou GT5 Earbuds
Play/Pause music
Put on/ take off Haylou GT5 earbuds or Click ×1 on R / L
Previous song/Next song
Clicks×2 on L/Clicks×2 on R
Answer/Hang up
Clicks×2
Reject call
Long press for 1s
Voice assistant
Clicks×3 on L
Turn on/Turn off game mode
Clicks×3 on R
Read more: Headphones control - Haylou GT5. Playing music, adjusting the volume...
When need to reset?
1. Only one earbud plays.
2. Haylou GT5 Earbuds cannot be connected to the phone.
3. Cannot switch to stereo mode.
4. Other malfunctions.
Factory Reset - Haylou GT5 Earbuds
1. Put Haylou GT5 earbuds back to the case.
2. Keep it in the case, at the same time press and hold both "Touch Control Areas" of the earbuds for 10 seconds. After that, the earbuds will quickly blink 3 times(red→white→red), and then release them. The light of earbuds always turns on after resetting successfully.
3. Unpair Bluetooth connection on the device, then turn on Bluetooth and search “ Haylou GT5” to connect again.
PS: Before resetting, please make sure that the earbuds and charging cases have sufficient power.
Can't charge?
Earbuds:
1. Charge the charging case for 1 hour before use.
2. Make sure that the charging case of Haylou GT5 earbuds contacts the charging pin in the charging case properly.
3. Make sure there is no dirt on the charging pin.
Charging Case:
1. Make sure the charging cable and interface are connected properly.
2. LED will not turn on if you put on charging cable when the case is topped up.
3. Repeat plugin/out cable or try different socket or plug.
4. Check if the charging pin is missing or loses its elasticity.
Read also
Ring Stick Up Cam Battery (3rd Generation) Wi-Fi IP Camera - Manual
Read also
Instructions - Haylou GT3 headphones. How to connect to a phone, Wearing...
Haylou GT1 Pro TWS Earbuds - Manual
How to use Xiaomi Earbuds Basic 2. Turn On, how to control...
Manual - Mi True Wireless Earphones 2 Basic. How to connect to a phone, Wearing...
Manual - Honor Choice CE79 headphones. How to charge, how To reset...
Instructions - Huawei FreeBuds Pro headphones. How to control, how To reset...