Reolink Argus Pro (Argus 2) WiFi IP Camera - User Guide

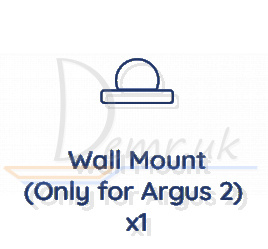
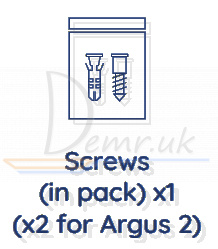
What’s in the Box - Wireless Reolink Argus Pro (Argus 2) Camera

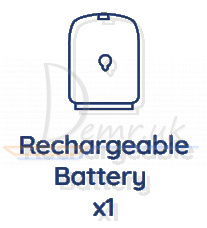


* Reolink Argus Pro (Argus 2) camera and the rechargeable battery are packed separately in the same package.
* Please use the skin for better weatherproof performance when you install the camera outdoors.
NOTE: Reolink Argus Pro camera and accessories vary with different camera models that you purchase.
Read more about Reolink Argus Pro (reviews, specifications, buy):
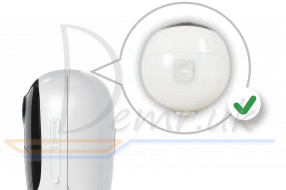
Reolink Argus Pro Camera Introduction
Install Rechargeable Battery - Reolink Argus Pro
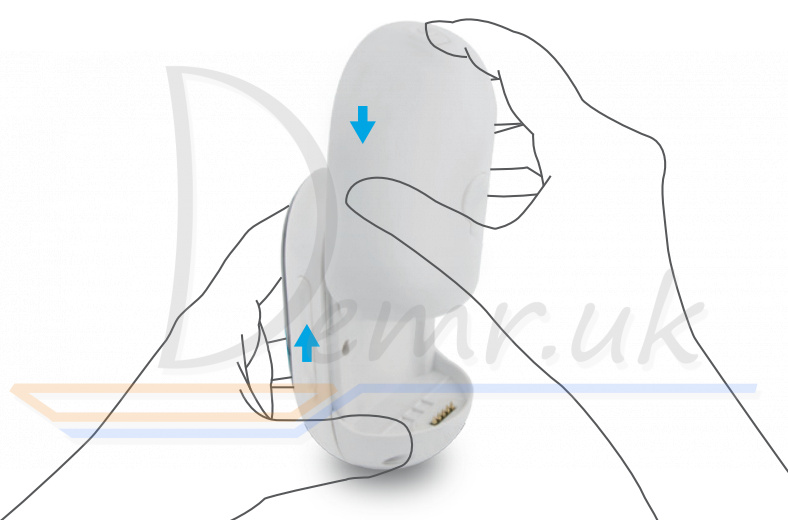
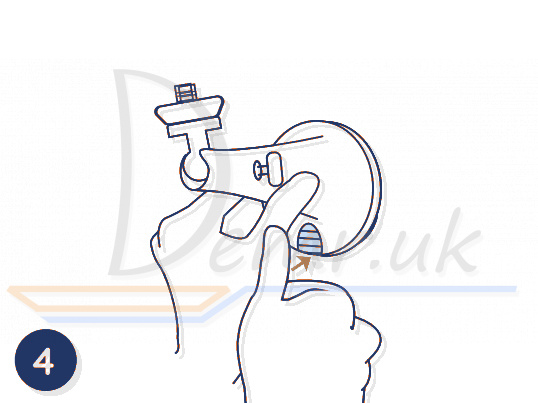
Slide the battery downward and lock it firmly.
Check the button status to see if the battery is installed correctly.
To remove the battery from the camera, please pull the button on the top of the battery and slide it upwards.
How to connect Reolink Argus Pro Camera to a Smartphone
Download and install the Reolink App in App Store (for iOS) and Google Play (for Android).
Please follow the prompt tone to configure Reolink Argus Pro (Argus 2) camera.
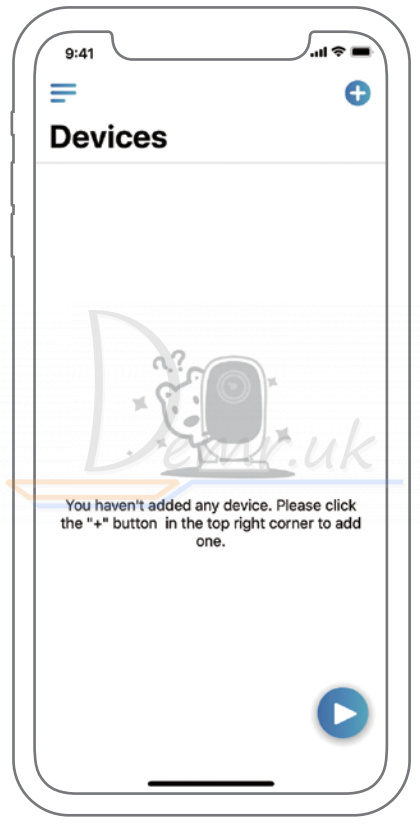
1. Please click the  button in the top right corner to add the camera.
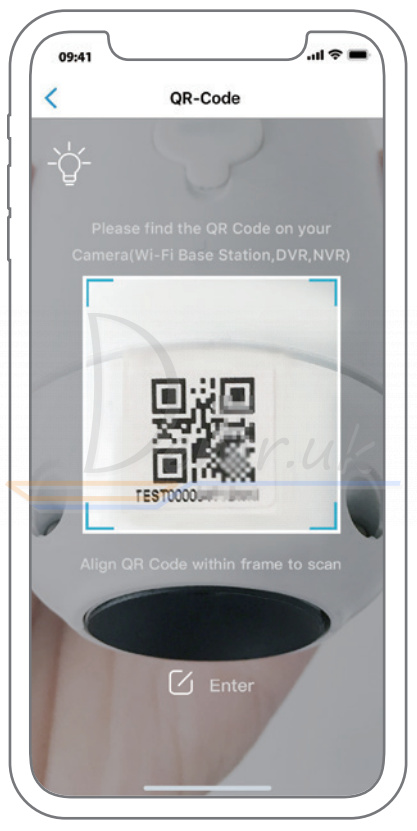
2. Scan the QR code on the back of the camera.
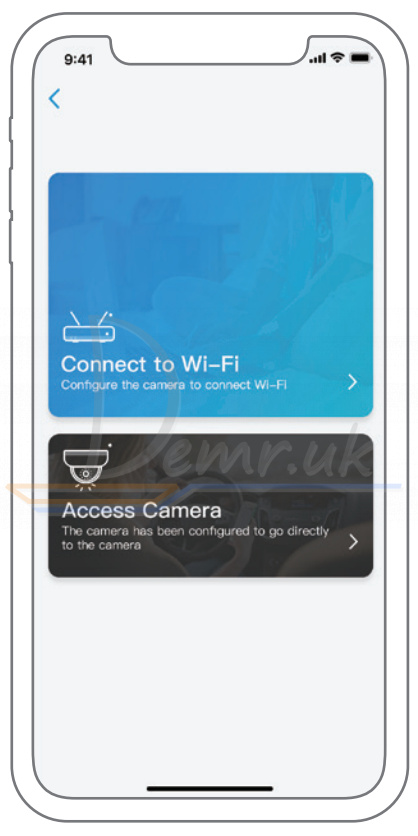
3. Click “Connect to Wi-Fi” to configure the wifi settings.
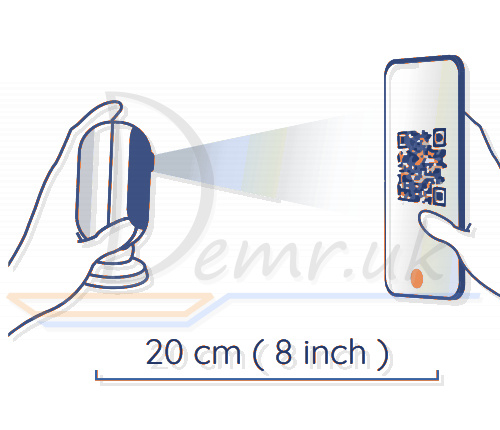
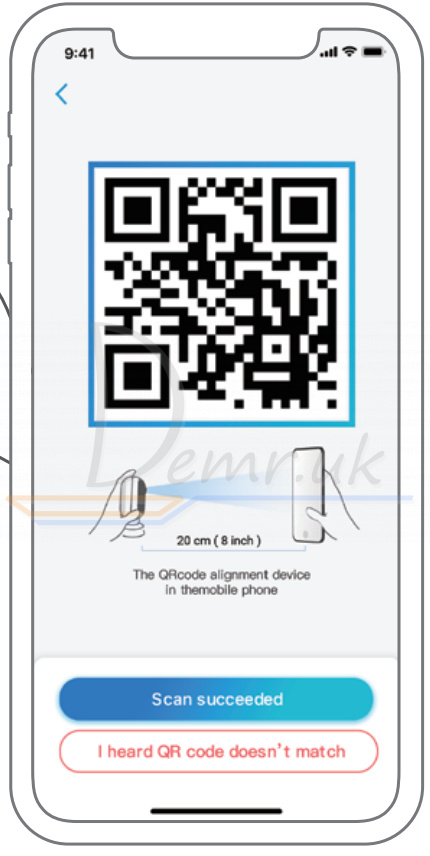
4. A QR code will be generated on the phone. Please place the QR code on your phone towards Reolink Argus 2 or Pro camera’s lens at a distance of about 20cm (8 inches) to let the camera scan the QR code. Please make sure that you’ve ripped the protection film of the camera’s lens.
Note: To help scanning, please click the QR code to display in full screen
5. Follow the steps to finish the Wifi settings.
6. After you created a password for your Reolink Argus Pro (Argus 2) camera, please follow the steps to sync the time, and then start live view or go to “Device Settings”
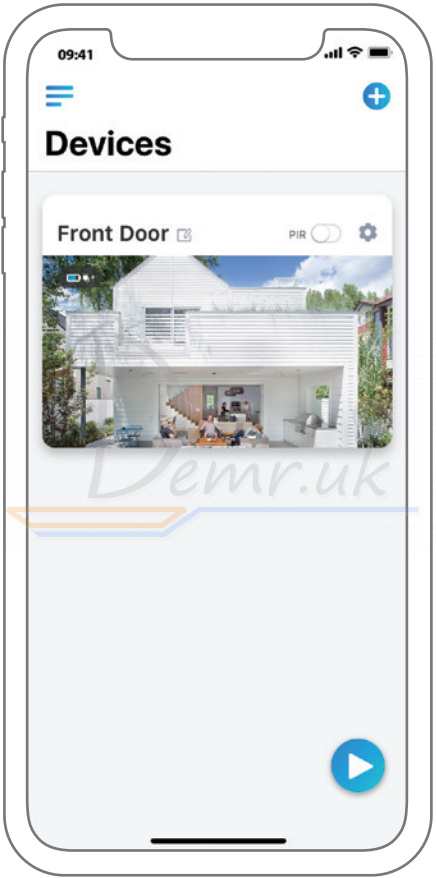

Menu

Add New Device

Enable/Disable PIR Motion Sensor (In default, the PIR sensor is enabled.)

Device Settings

Access the Live View

Battery Status
Read more about Reolink Argus Pro (reviews, specifications, buy):
Setup Camera on Reolink Client (For PC)
Please download the client software from our official website: https://reolink.com/software-and-manual and install it.
Note: The camera must be first set up on Reolink App before being connected to Reolink Client.
Launch the Reolink Client software and manually add the camera to the Client. Please follow the steps below.
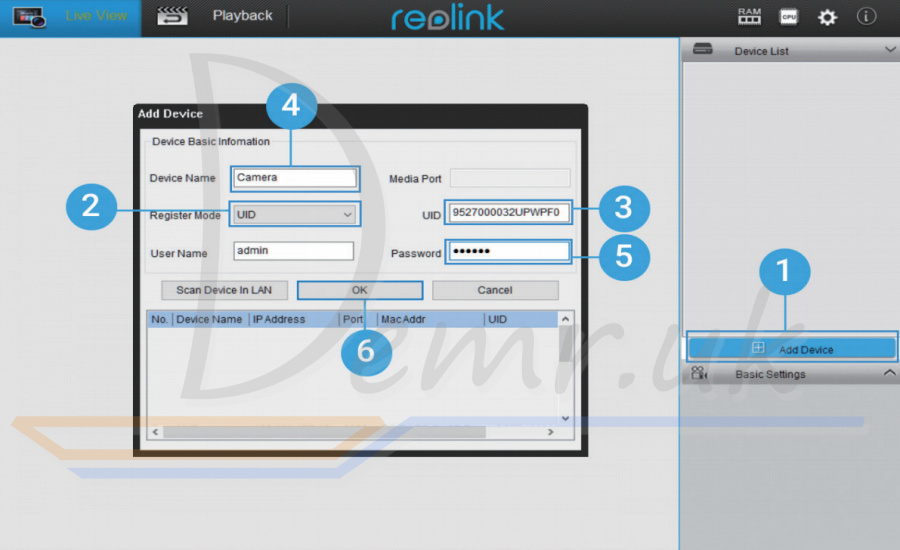
In LAN
1. Click “Add Device” on the right-side menu.
2. Click "Scan Device in LAN".
3. Double click on the camera you want to add. The information will be filled in automatically.
4. Input the password created on Reolink App to log in.
5. Click “OK” to log in.
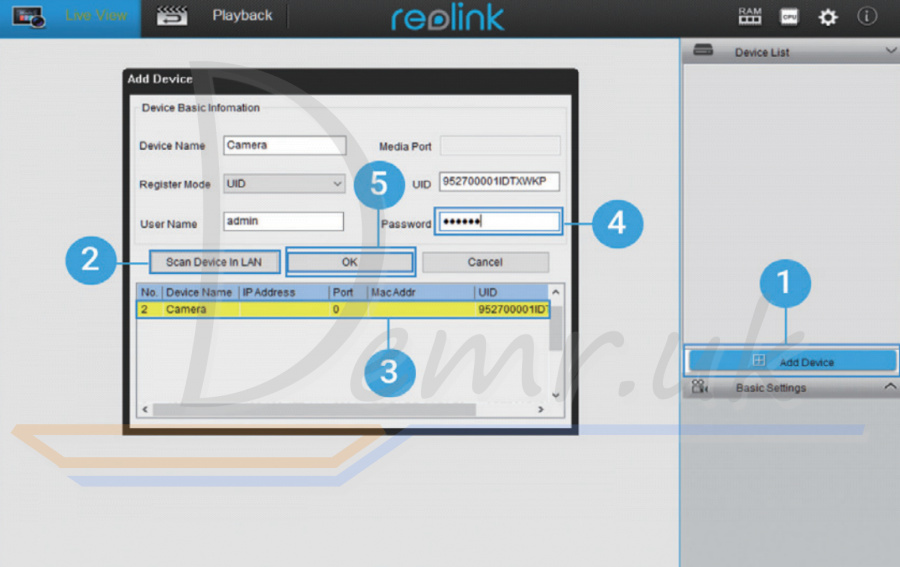
In WAN
1. Click “Add Device” on the right-side menu.
2. Choose “UID” as the Register Mode.
3. Type in the UID of your camera.
4. Create a name for the camera displayed on Reolink Client.
5. Input the password created on Reolink App to log in.
6. Click “OK” to log in.
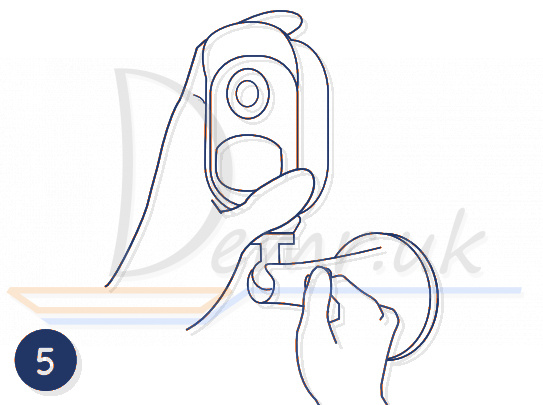
Charge the Battery - Reolink Argus Pro Camera
Charge the battery with a power adapter.
Battery can also be charged separately.

Charge the battery with the Reolink Solar Panel.
For the weatherproof performance, always cover the USB charging port with the rubber plug after finishing charging the battery.
Charging indicator:
 Orange LED: Charging
 Green LED: Fully charged
NOTE: The solar panel is NOT included in the package, you can buy it on Reolink official online stores.
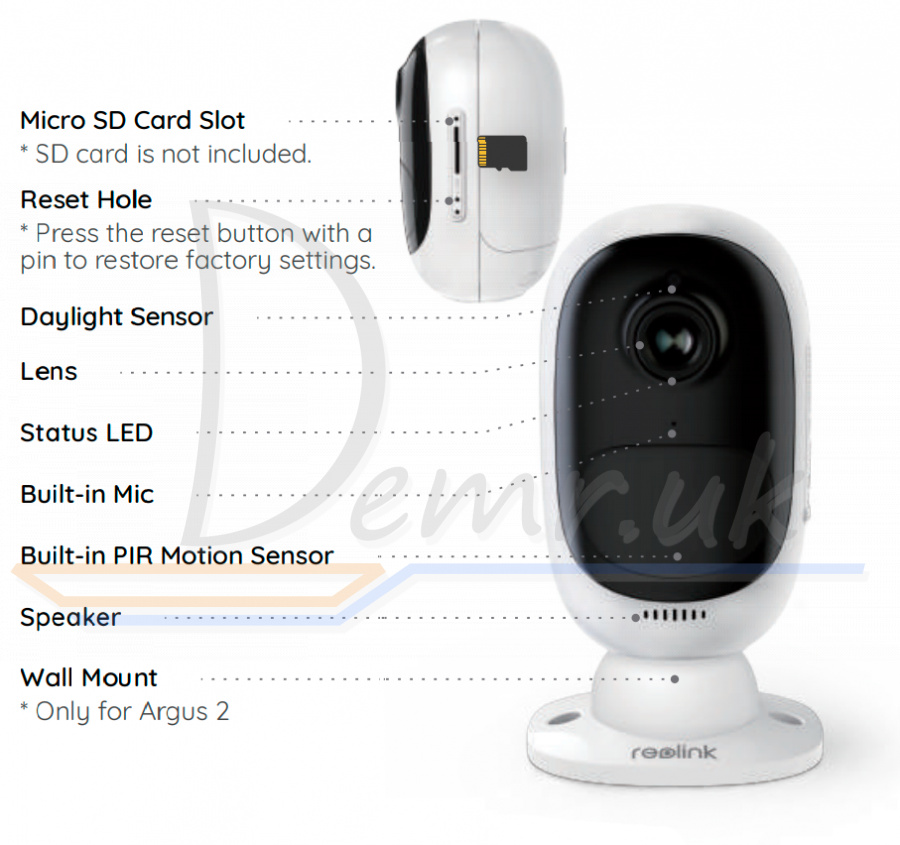
How to Install Reolink Argus Pro (Argus 2) Camera
• Use Reolink Argus Pro camera skin for better weatherproof performance when you install the camera outdoors.
• Install Reolink Argus Pro (Argus 2) camera 2-3 meters (7-10 ft) above ground. The detection range of the motion sensor would be maximized at such a height.
• For effective motion detection, please install the camera angularly.
NOTE: If a moving object approaches the PIR sensor vertically, the camera may fail to detect motion.
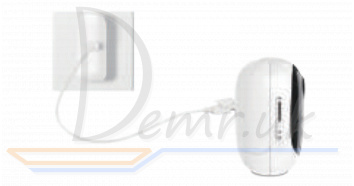
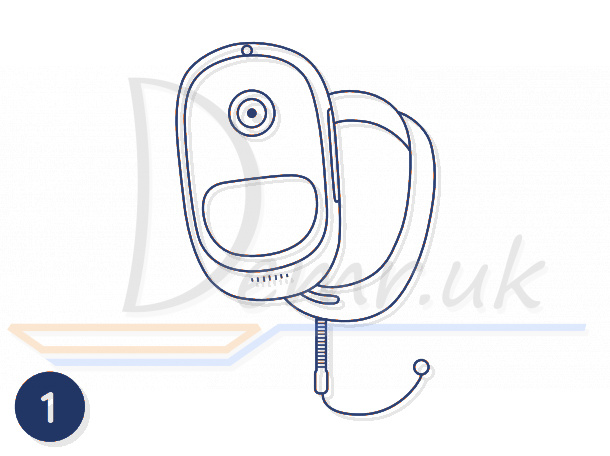
Mount Reolink Argus Pro Camera into a Wall
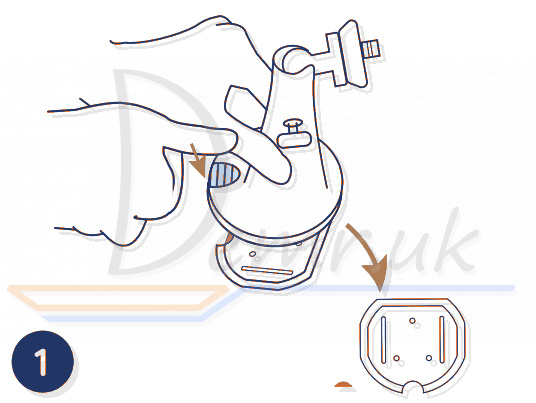
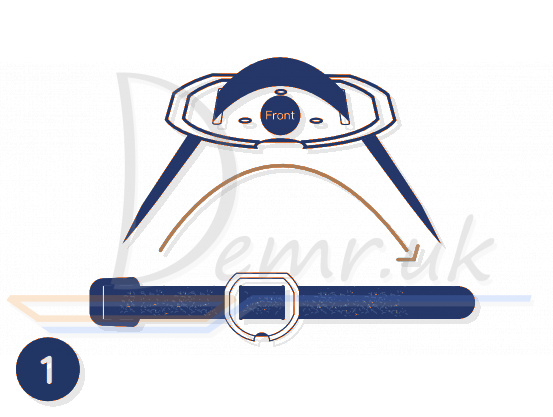
Press the button to release the plate from the security mount.
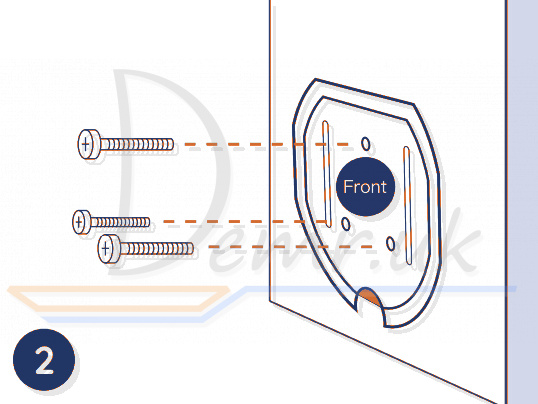
Screw the security mount plate into the wall.
Lock the security mount on its plate. (Make sure the top edge of the plate is inserted into the mount.)
Press the security mount button until its plate clicks into the mount.
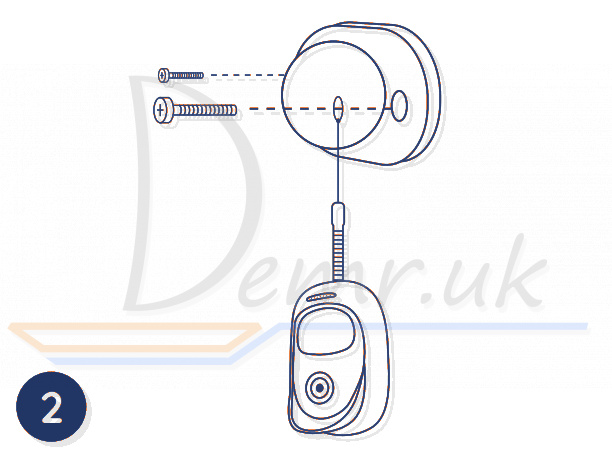
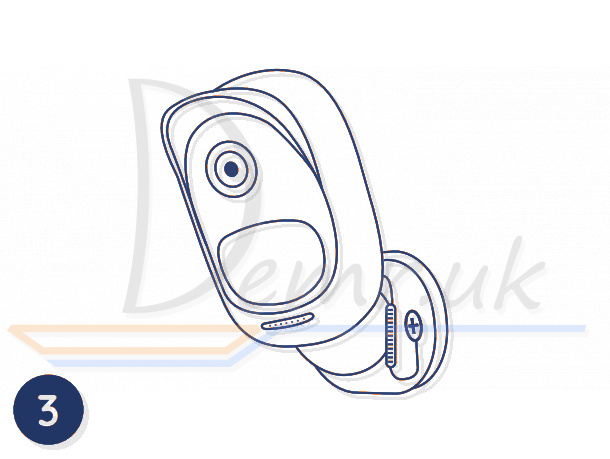
Screw the camera, adjust its angle and tighten the knob to lock it.
Attach Reolink Argus Pro (Argus 2) Camera to a Tree
Thread the provided strap to the mounting plate.
Fasten the mounting plate to a tree.
Follow the steps 3-5 in the wall mounting to finish installation.
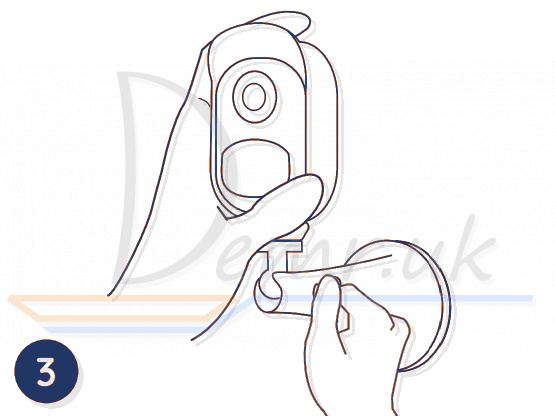
Magnet (for Argus 2 only)
Put up the skin, provided in the package, for Reolink Argus 2 camera.
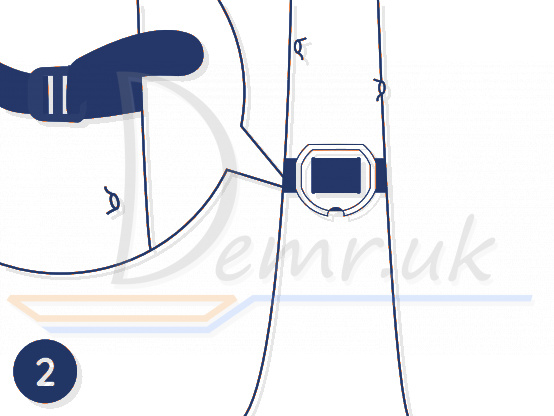
There is an anti-falling safety rope. Please fasten the other end of the rope to the wall mount when mounting it into a wall.
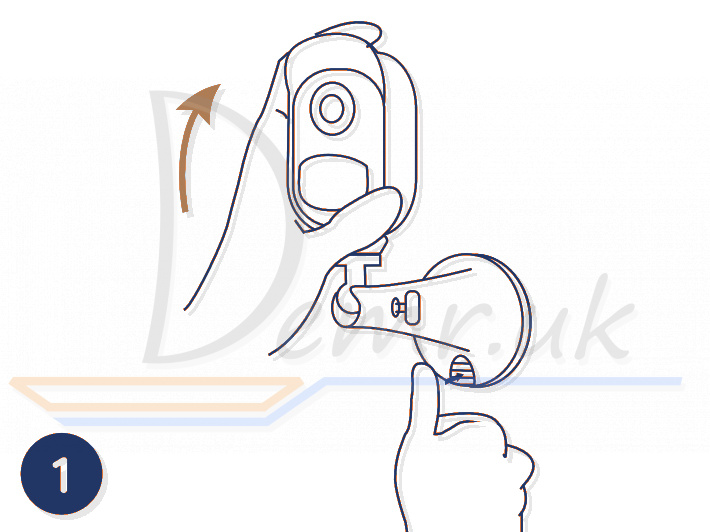
Stick the camera to the wall mount and twist the camera to adjust direction.
Remove the Camera
Press the security mount button to remove the mount out.
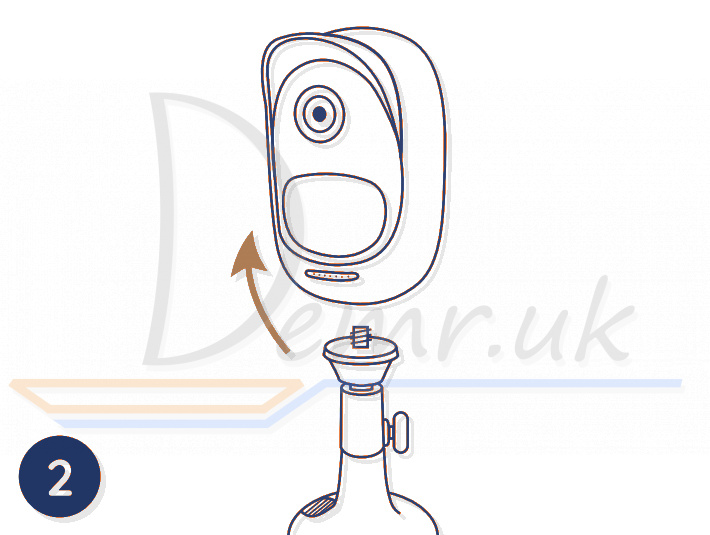
Unscrew the camera from the security mount.
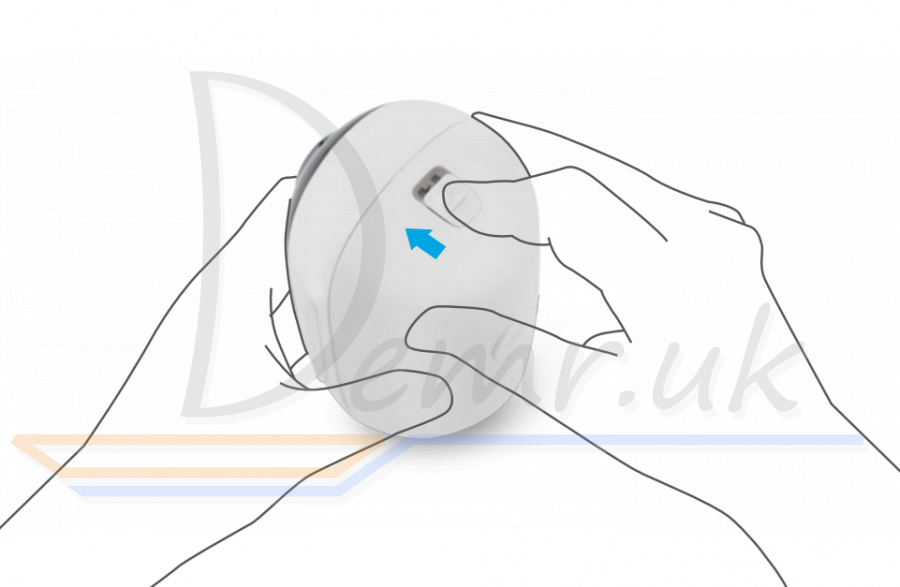
How to Reset Wi-Fi Smart Reolink Argus Pro (Argus 2) Camera
Step 1. Insert a reset needle into the reset hole of your camera.
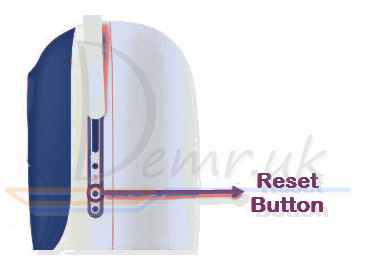
Step 2. Press and hold for several seconds until you hear the prompt “Factory reset succeeded!” or beeping(new version of prompt), which means the camera is factory reset successfully. Then release the Reset button.
Done! You've successfully factory reset your Reolink Argus Pro (Argus 2) camera. Please run Reolink App, scan the QR code and set up the camera again.
PIR Sensor Detection Range - Reolink Argus Pro
The PIR detection range can be customized to meet your specific needs. You may refer to the following table to set it up in Device Settings via Reolink App.
| Sensitivity | Value | Detection Distance (For moving and living objects) |
| Low | 0 - 50 | Up to 5 meters (16ft) |
| Mid | 51 - 80 | Up to 8 meters (26ft) |
| Mid | 81 - 100 | Up to 10 meters (33ft) |
NOTE: The detection range would be wider with higher sensitivity but it would lead to more false alarms. It is recommended to set up the sensitivity level to “Low” or “Mid” when you install the camera outdoors
Notes on Rechargeable Battery Usage
Reolink Argus 2 or Argus Pro is not designed for 24/7 full capacity running or around-the-clock live streaming. It’s designed to record motion events and remotely view live streaming only when you need it. Learn useful tips on how to extend the battery life in this post: https://support.reolink.com/hc/en-us/articles/360006991893 1. Charge the rechargeable battery with a standard and high-quality DC 5V/9V battery charger or Reolink solar panel. Do not charge the battery with solar panels from any other brands.
2. Charge the battery in temperatures between 0°C and 45°C and always use the battery in temperatures between -20°C and 60°C.
3. Make sure the battery compartment is clean and the battery contacts are aligned.
4. Keep the USB charging port dry, clean and free of any debris, and cover the USB charging port with the rubber plug when the battery is fully charged.
5. Never charge, use or store the battery near any ignition sources, such as fire or heaters.
6. Store the battery in a cool, dry and ventilated environment.
7. Never store the battery with any hazardous or combustible objects.
8. Do keep the battery away from children.
9. Do not short-circuit the battery by connecting wires or other metal objects to the positive (+) and negative (-) terminals. Do not transport or store the battery with necklaces, hairpins or other metal objects.
10. Do not disassemble, cut, puncture, short-circuit the battery, or dispose of the battery in water, fire, microwave ovens and pressure vessels.
11. Do not use the battery if it gives off an odor, generates heat, becomes discolored or deformed, or appears abnormal in any ways. If the battery is being used or charged, remove the battery from the device or the charger immediately, and stop using it.
12. Always follow the local waste and recycle laws when you get rid of the used battery.
Troubleshooting - Reolink Argus Pro (Argus 2) Camera
Reolink Argus Pro (Argus 2) Camera is not powering on
If your camera is not powering on, please apply the following solutions:
• Make sure the battery is correctly inserted into the compartment.
• Charge the battery with a DC 5V/2A power adapter. When the green light is on, the battery is fully charged.
• If you have another spare battery, please swap the battery to have a try.
Failed to scan the QR code on the phone
If you fail to scan the QR code on your phone, please apply the following solutions:
• Remove the protective film on the lens of the camera.
• Wipe the camera lens with a dry paper/towel/tissue.
• Vary the distance between your camera and the mobile phone so that the camera can focus better.
• Try to scan the QR code under sufficient lighting.
Failed to connect to WiFi during initial setup
If Reolink Argus Pro (Argus 2) camera fails to connect to WiFi, please try the following solutions:
• Make sure the WiFi frequency band meets the network requirement of the camera.
• Ensure that you have entered the correct WiFi password.
• Put the camera closer to your router to ensure a strong WiFi signal.
• Change the encryption method of the WiFi network to WPA2-PSK/WPA-PSK (safer encryption) on your router interface.
• Change your WiFi SSID or password and make sure that SSID is within 31 characters and password is within 64 characters.
• Set your password using only the characters available on the keyboard.
Specifications - Reolink Argus Pro (Argus 2)
Video
Video resolution: 1080p HD at 15 frames/sec
Field of View: 130° diagonal
Night Vision: Up to 10m (33 ft)
PIR Detection & Alerts
PIR Detection Distance: Adjustable/up to 10m (33ft)
PIR Detecting Angle: 120° horizontal
Audio Alert: Customized voice-recordable alerts
Other Alerts: Instant email alerts and push notifications
General
Operating Frequency: 2.4GHz
Operating Temperature: -10°C to 55°C (14°F to 131° F)
Weather Resistance: IP65 certified weatherproof
Size: 96 x 58 x 59mm
Weight (Battery included): 260g (9.2 oz) (Argus 2)/230g (8.1 oz) (Argus Pro)
Read more about Reolink Argus Pro (reviews, specifications, buy):
Read also
Ring Stick Up Cam Battery (3rd Generation) Wi-Fi IP Camera - Manual
Read also
Manual - Arenti GO1. Mobile app, Specification...
Manual - TP-LINK Tapo C200 Camera. Factory reset, Connecting to a phone...
User guide - Reolink Argus 3 Pro WiFI Camera. Installation, Restore...
Ring Stick Up Cam Battery (3rd Generation) Wi-Fi IP Camera - Manual
Ratings
14 Best Indoor Wireless Security Cameras. Reviews, Benefits...
Demr.UK is a participant in the Amazon Services LLC Associates Program, an affiliate advertising program designed to provide a means for sites to earn advertising fees by advertising and linking to products on Amazon.com. Amazon and the Amazon logo are trademarks of Amazon.com, Inc, or its affiliates.