How To Install WiFi IP Cameras
Choose a section
How To Install Arenti WiFi IP Cameras
How To Install Foscam WiFi IP Cameras
How To Install Reolink WiFi IP Cameras
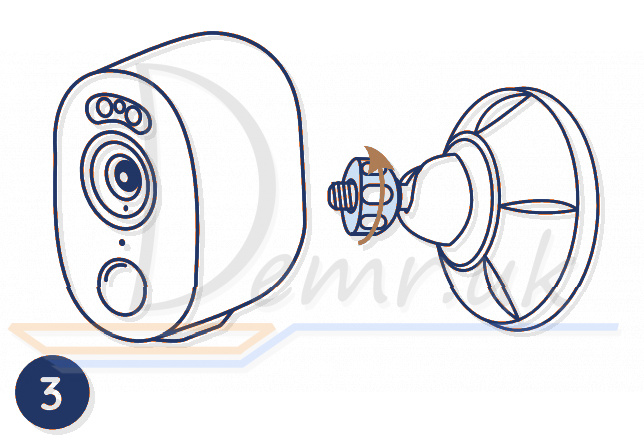
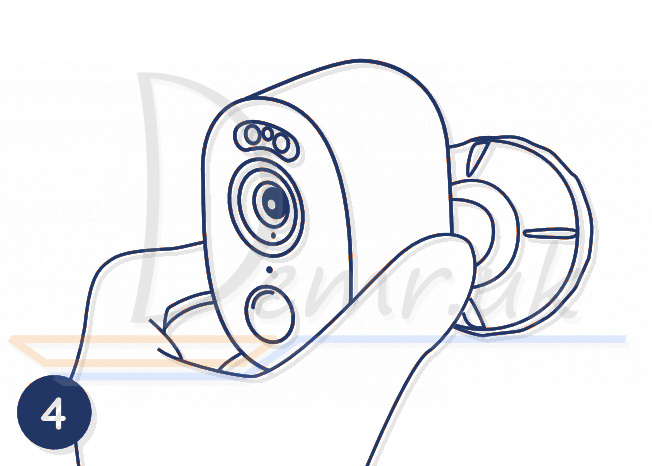
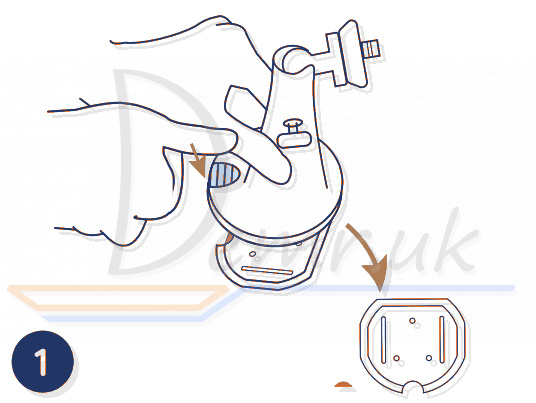
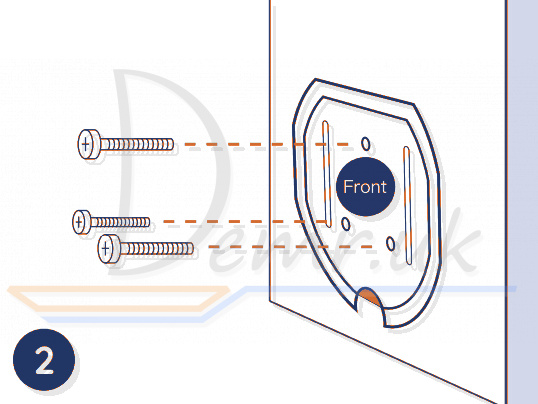
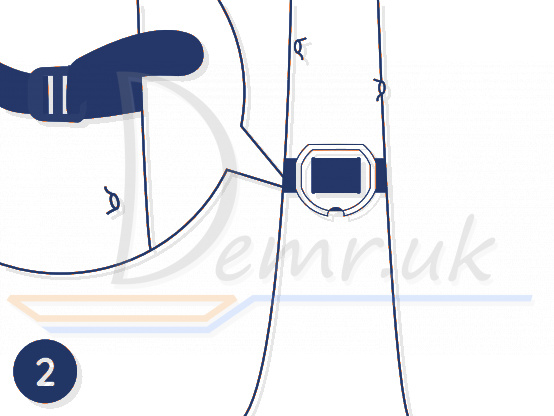
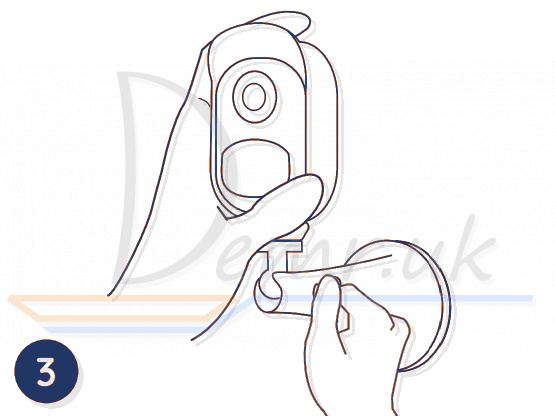
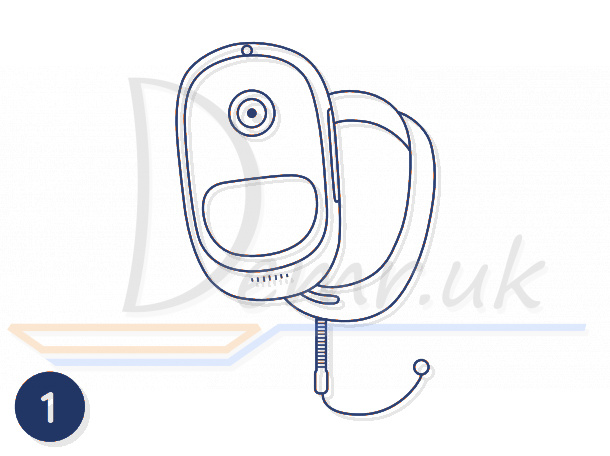
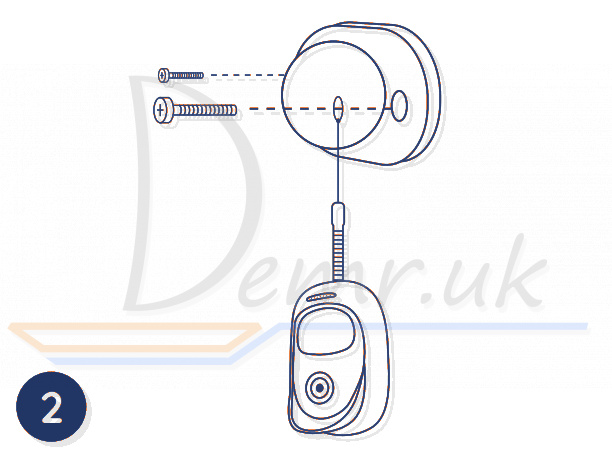
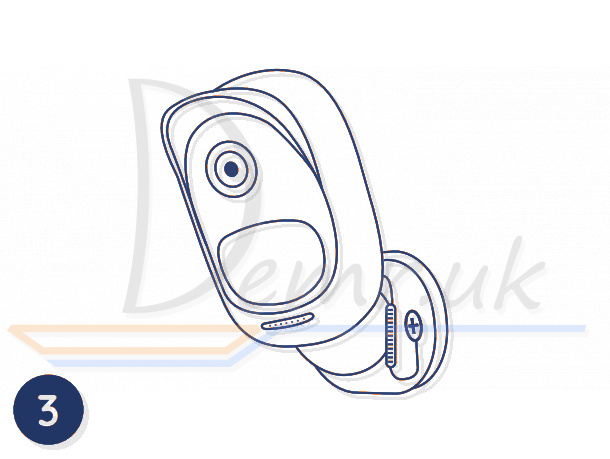
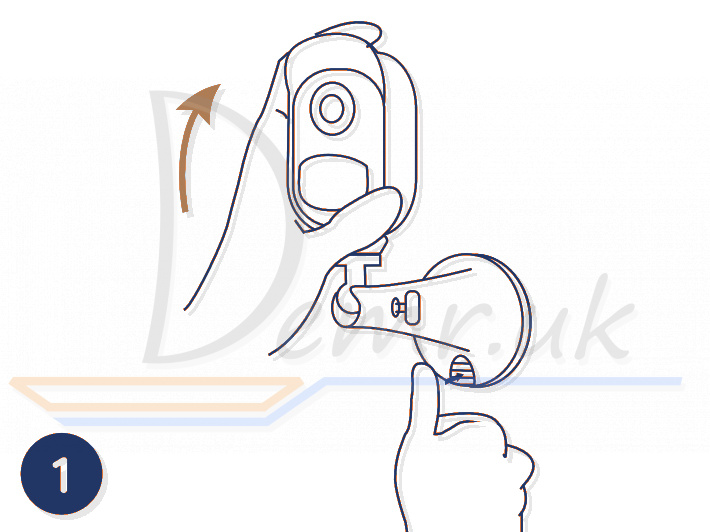
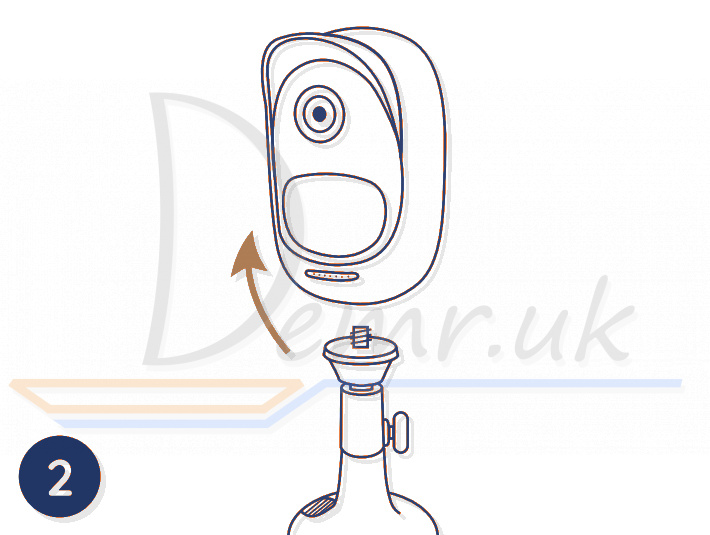
How to install Arenti GO1 Camera
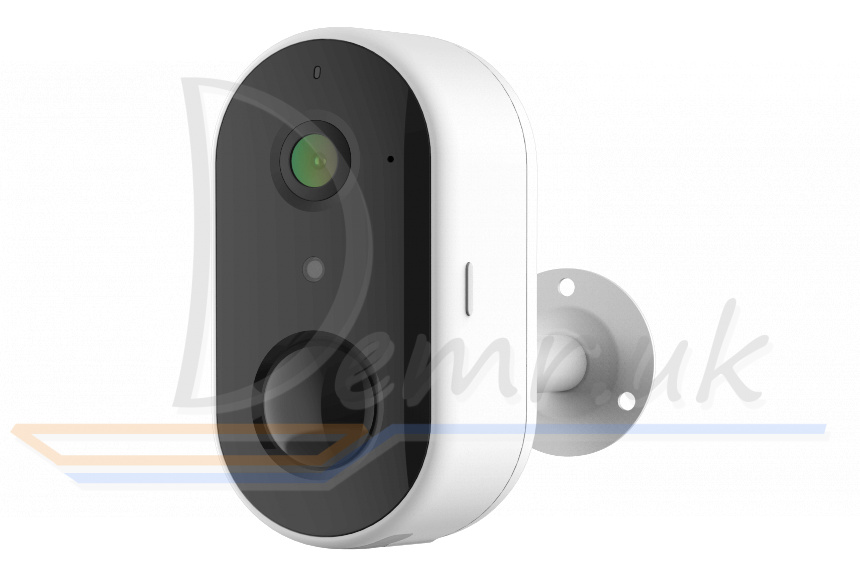
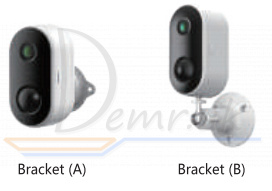
Read more: Manual - Arenti GO1 WiFI IP Camera. Factory reset, Connecting to a phone...
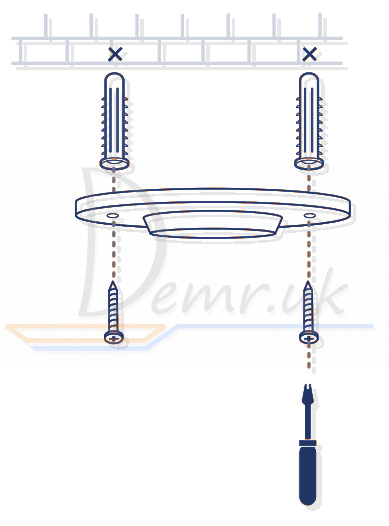
How to mount TP-Link Tapo C200 Camera
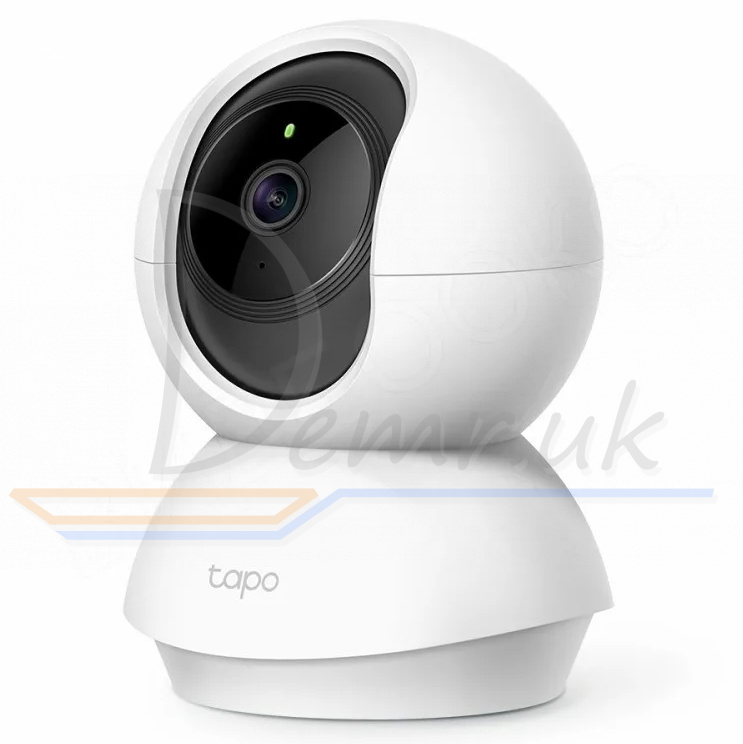
Place your TP-Link Tapo C200 camera on a flat surface, or install it on a wall or ceiling with the provided mounting template and screws.
Note: Make sure you affix the camera base using screws before securing the camera.
1. Mark Position
Place the mounting template where you want the camera.
For wall mounting, drill two holes through two circles.

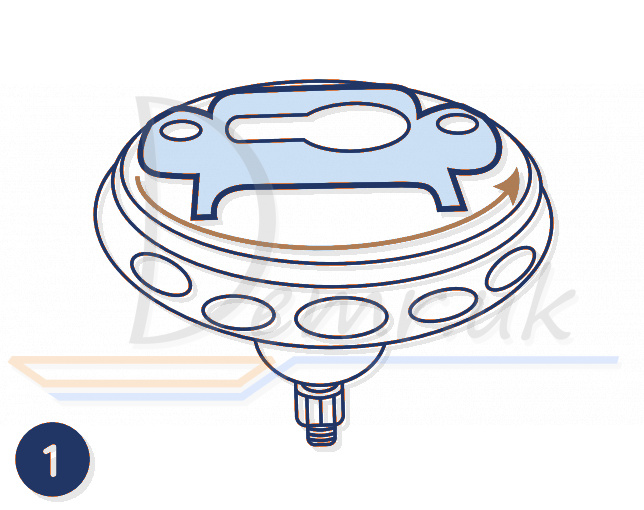
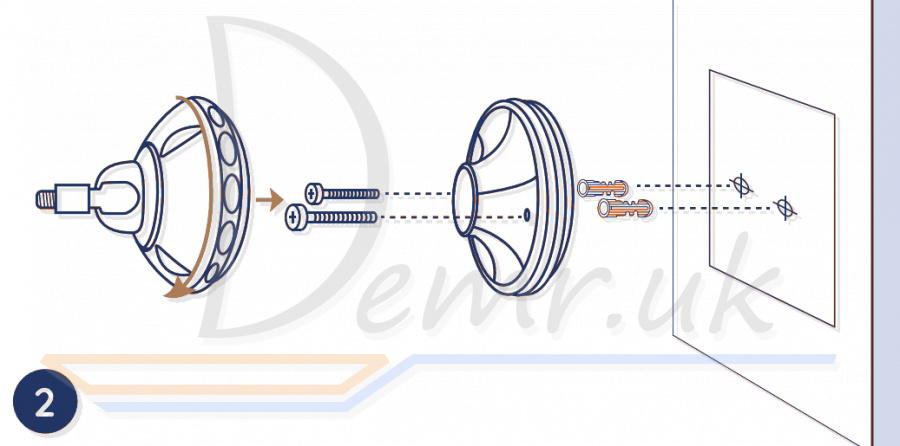
2. Mount Base
Affix the camera base using the screws.
For wall mounting, insert two anchors into the holes and use the screws to affix the camera base over the anchors.
3. Secure TP-Link Tapo C200 Camera
Attach the camera on the base and rotate to secure the camera.

Read more: Manual - TP-LINK Tapo C200 WiFI IP Camera. How To connect to a Phone, Mounting...
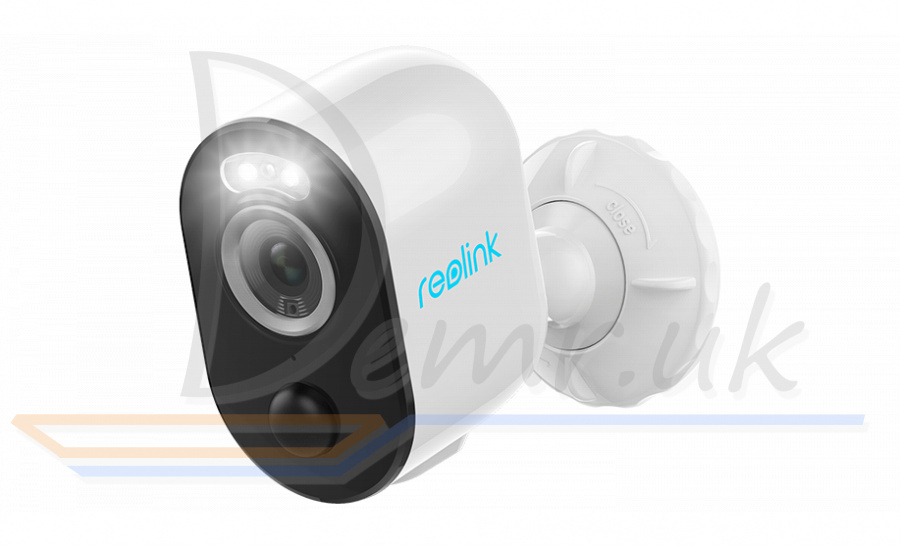
Install the Camera - Reolink Argus 3 Pro
Notes on Camera Installation Position
• Install Reolink Argus 3 Pro camera 2-3 meters (7-10ft) above the ground to maximize the detection range of the PIR motion sensor.
• For effective motion detection, please install the camera angularly.
NOTE: If a moving object approaches the PIR sensor vertically, the camera may fail to detect motion.
Mount the Camera to the Wall
It is suggested to use the security bracket to install the camera when mounting it outdoors.
Rotate the base to separate it from the bracket.
Drill holes in accordance with the mounting template and screw the base of the bracket to the wall. Next, attach the other part of the bracket to the base.
NOTE: Use the drywall anchors included in the package if needed
Screw the camera to the bracket.
Adjust the camera angle to get the best field of view.

Turn the upper part on the bracket to secure the camera.
To adjust the camera angle later, please loosen the bracket by turning the upper part anticlockwise.
NOTE: If you own an Argus 3 Pro and would like to use the magnetic bracket to install it, please install the base of the bracket to the wall, and screw the magnet to the camera with a screw driver, then attach the camera to bracket.
Read more: User guide - Reolink Argus 3 Pro WiFI IP Camera. Mobile app, Specification...
How to Install Reolink Argus Pro (Argus 2) Camera

• Use Reolink Argus Pro camera skin for better weatherproof performance when you install the camera outdoors.
• Install Reolink Argus Pro (Argus 2) camera 2-3 meters (7-10 ft) above ground. The detection range of the motion sensor would be maximized at such a height.
• For effective motion detection, please install the camera angularly.
NOTE: If a moving object approaches the PIR sensor vertically, the camera may fail to detect motion.
Mount Reolink Argus Pro Camera into a Wall
Press the button to release the plate from the security mount.
Screw the security mount plate into the wall.
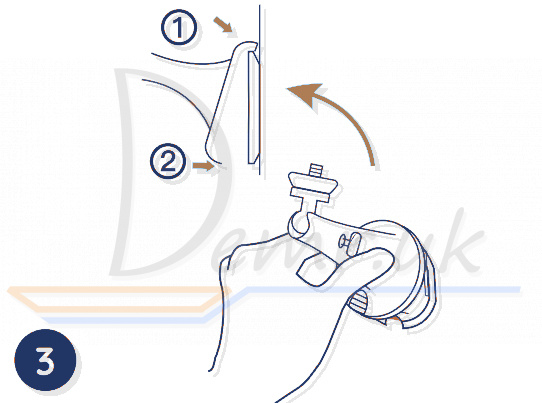
Lock the security mount on its plate. (Make sure the top edge of the plate is inserted into the mount.)
Press the security mount button until its plate clicks into the mount.
Screw the camera, adjust its angle and tighten the knob to lock it.
Attach Reolink Argus Pro (Argus 2) Camera to a Tree
Thread the provided strap to the mounting plate.
Fasten the mounting plate to a tree.
Follow the steps 3-5 in the wall mounting to finish installation.
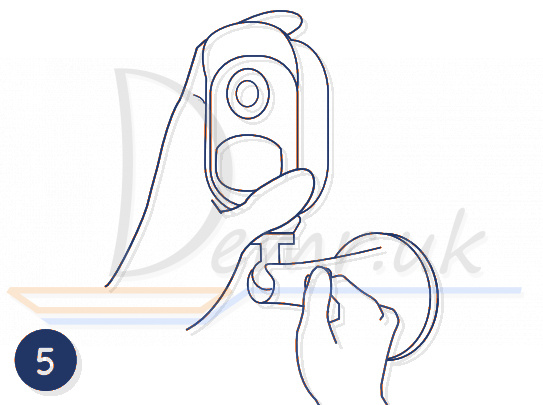
Magnet (for Argus 2 only)
Put up the skin, provided in the package, for Reolink Argus 2 camera.
There is an anti-falling safety rope. Please fasten the other end of the rope to the wall mount when mounting it into a wall.
Stick the camera to the wall mount and twist the camera to adjust direction.
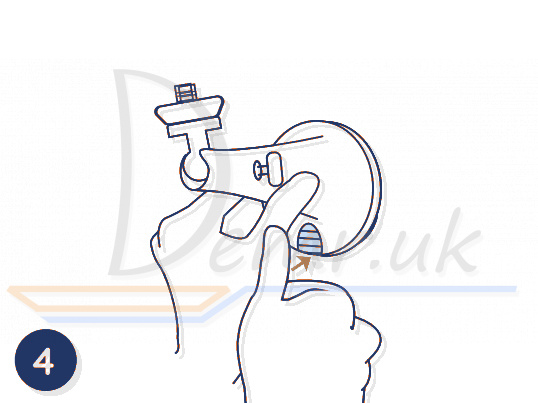
Remove the Camera
Press the security mount button to remove the mount out.
Unscrew the camera from the security mount.
Read more: Installation guide - Reolink Argus Pro Camera. Specification, Installation...
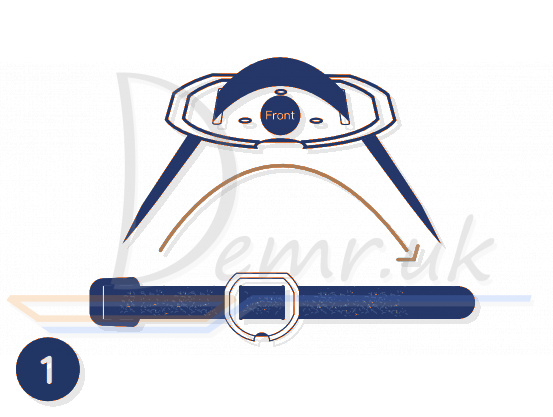
F. Hardware Installation (Foscam C2)
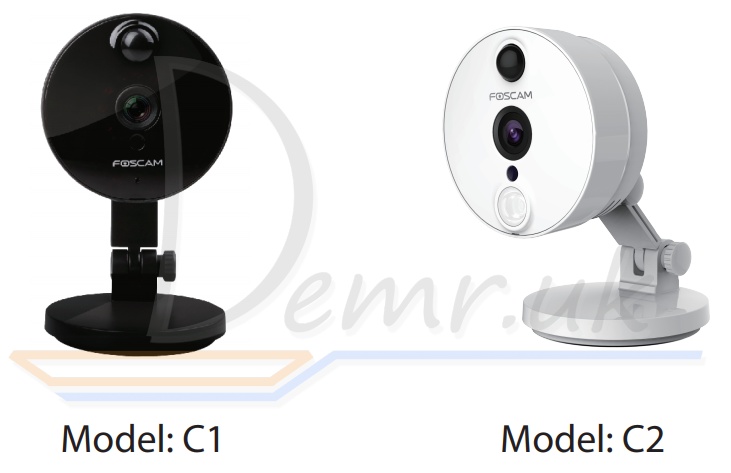
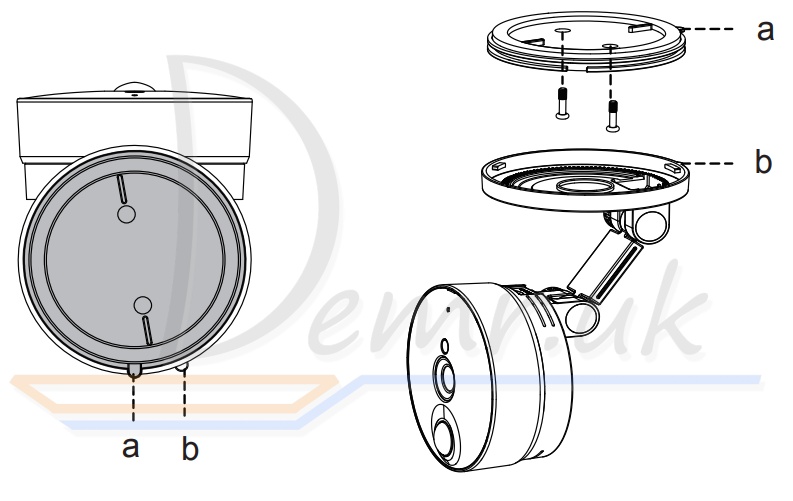
1. Rotate the base of the camera until points a and b are aligned, this allows for the mounting plate to be removed.
2. Install the mounting plate on a wall or ceiling with supplied fixing screws.
3. Align points a and b to insert the camera base to the mounting plate. Rotate so that points a and b are no longer aligned, this attaches the camera securely to the base.
Read more: Foscam C1, C2 quick installation guide.
Hardware Installation (Sricam SP020)
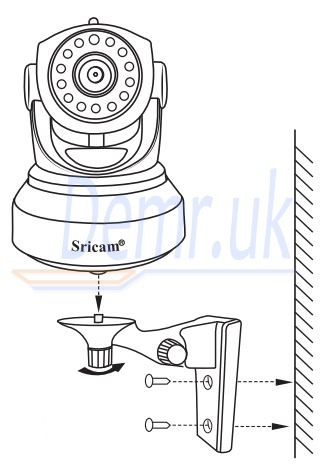
1: Screw the mount on the wall with the two screws Provided.
2: Loosen the thumb screws to adjust the mount to the desired position. Once the position is set, tighten the screws securely.
Read more: Sricam IP Camera - User Manual
Ratings
14 Best Indoor Wi-Fi Security Cameras. Reviews, Characteristics...
Top 15 Outdoor Smart Security Cameras. Reviews, Characteristics...